Datatypes
Before you can select a sku option such as a size for the dress you're selling or color options for a new phone cover for sale, the options need to be added to the system via the "Data Types section.
The "Data Types" section of the Ecommerce "Setup" allows you to create and manage all of the different fields and variables that will be available within the module for use in creating products, promotions, orders, and more.
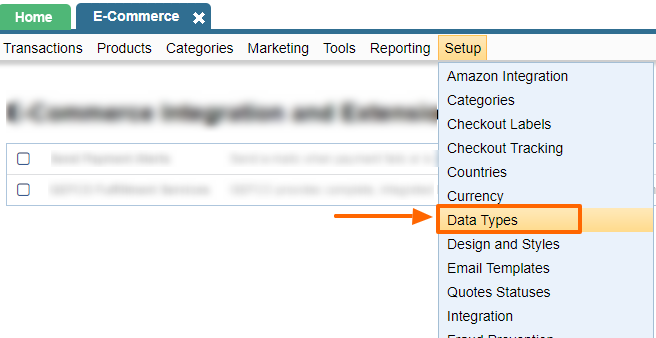
Creating Data Types
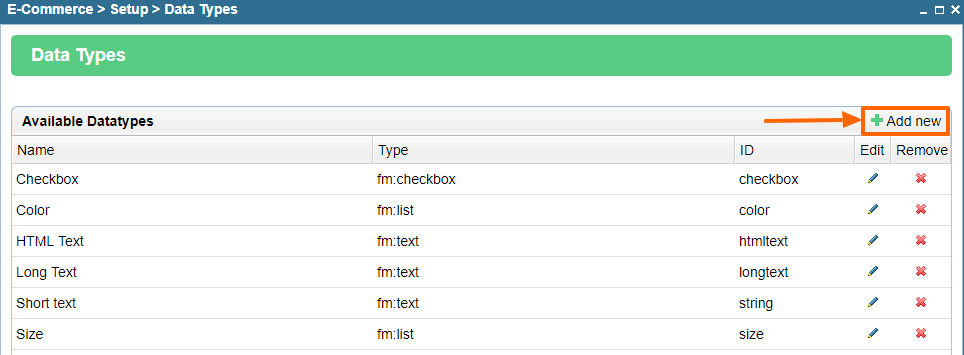
In order to create a new data field, simply click on the "Add" icon in the upper right-hand corner of the table.
You will then be able to enter an original name for the field, as well as select the type of field you wish to create (text box, list, check-box, etc.) from the drop-down menu provided.
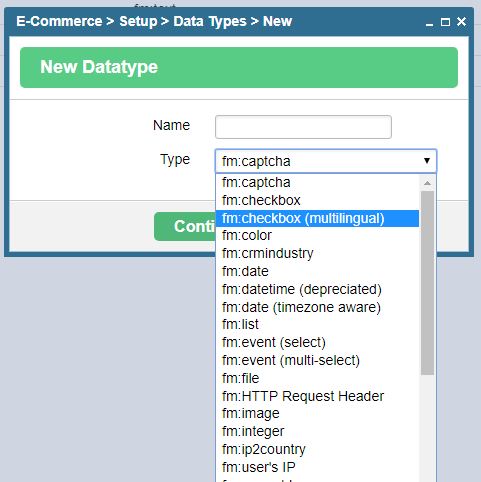
Once you have named the field and specified its type, you will be able to complete the field's specifics.
For example, if you have selected "List" as the field's type, you will be presented with a window labeled "Edit the Enumeration List," in which you can customize the list to your liking.
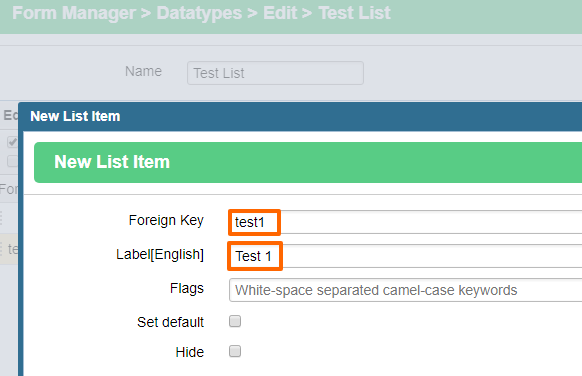
Simply enter labels for the different options you would like to appear in the list, using the "Add new" button at the bottom of the window to add additional options.
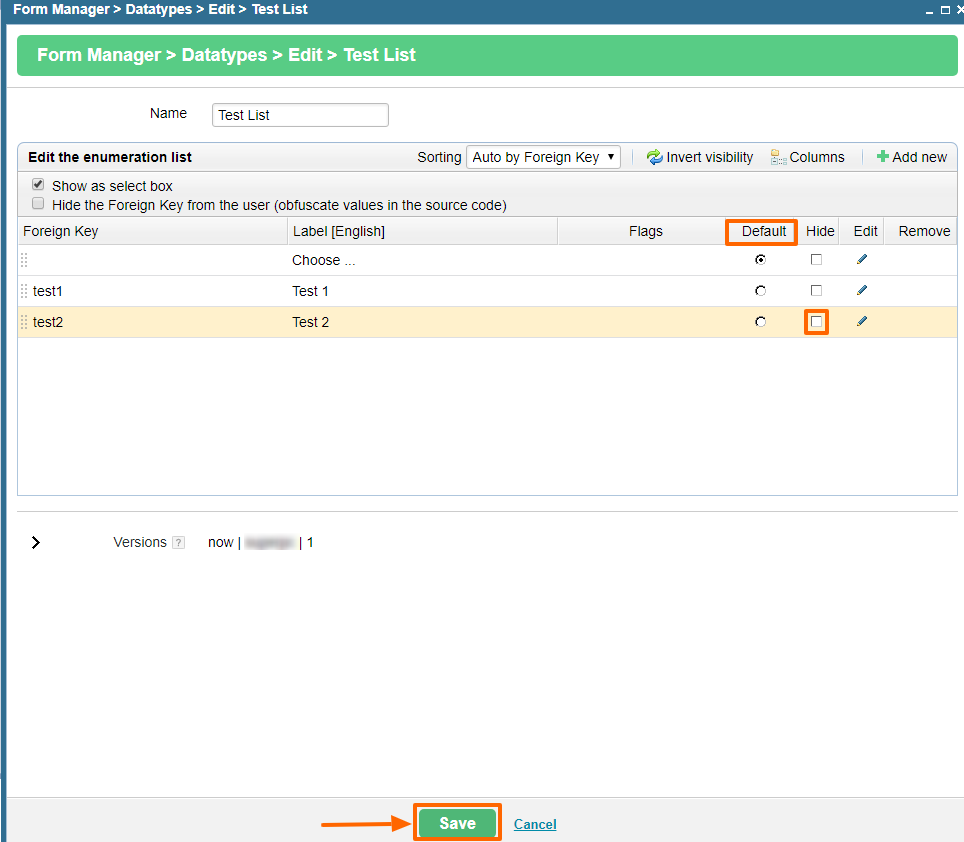
Once you have finished enumerating the options you would like to be displayed in the list, simply click "Save" and the new field will be added to the "Available Datatypes" table.
Modifying Data Types
Should you wish to edit an existing field at any point, simply click on the "Edit" icon in the desired field's row of the table.
You will then be able to modify the name of the field, as well as the specifics of its appearance, as you wish.
For example, should you wish to edit a field with the type specified as "List," you will be presented with a window, like the one pictured below, in which you can modify the field's name in the "Details" table and the names of the list's individual options within the "Edit the Enumeration List" table.
Should you wish, you can also change the order of the optionsby clicking and dragging the item to where you would like to move a particular option to.
And should you decide to remove an option from the list entirely, this can be done as well, by simply clicking on the "Delete" icon in that option's row of the "Edit the Enumeration List" table.
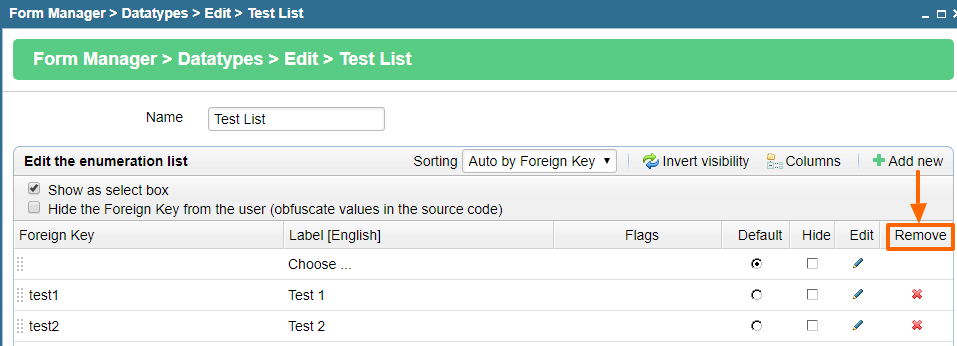
Once you have completed your alterations, simply click on "Save" or "Done" and the changes will be applied to the system.
Removing Data Types
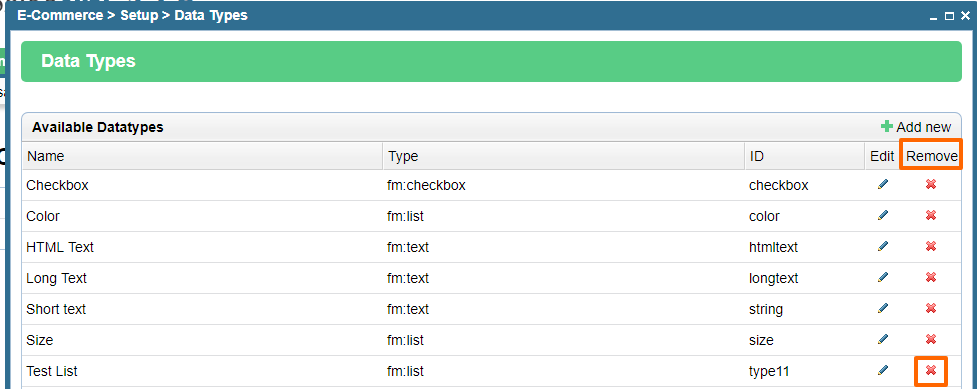
If at any point you decide that you would like to remove a field entirely, this can be done with ease as well.
Just click on the "Delete" icon in the desired field's row of the "Available Datatypes" table, and it will no longer be available in the Ecommerce module.
Add Data Types to Products
In order for your newly added data type to appear in the other sections of ecommerce, it needs to be added to a product type. Read more about how to connect datat types to products here.
Please send us suggestions regarding this documentation page
If you would like to recommend improvements to this page, please leave a suggestion for the documentation team.
