Categories Setup
By default, e-commerce category settings fulfill needs of a majority of websites. Nevertheless, there are ways that you can customize this section further.
To reach category settings, open the "E-commerce" module. Then hover on "Setup". Select "Categories" in the dropdown.
After clicking on "Categories", a popup containing two tabs will open: "Settings" and "Custom Fields". Below we'll describe those in details.
Settings
Settings tab deals with settings that come by default with the "E-commerce" module.
It has the following options to edit:
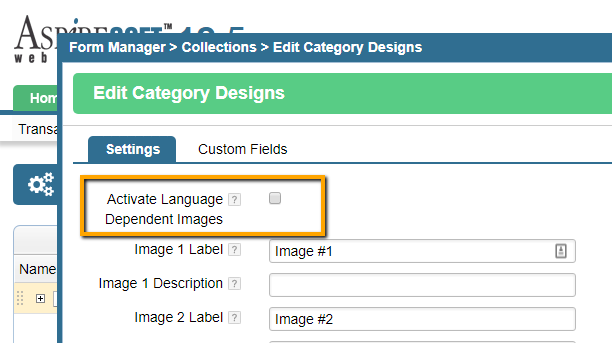
- checkbox "Activate Language Dependent Images";
- four text fields "Image Label" ("Image 1 Label", "Image 2 Label", "Image 3 Label", "Image 4 Label");
- four text fields "Image Description" ("Image 1 Description", "Image 2 Description", "Image 3 Description", "Image 4 Description");
Below we will describe what each of those fields mean.
Activate Language Dependent Images
In case you want to have custom designed category images, that will have some text and your website is multi-lingual, you can check “Activate Language Dependent Images”. Don't forget to click "Save" button to save your changes.
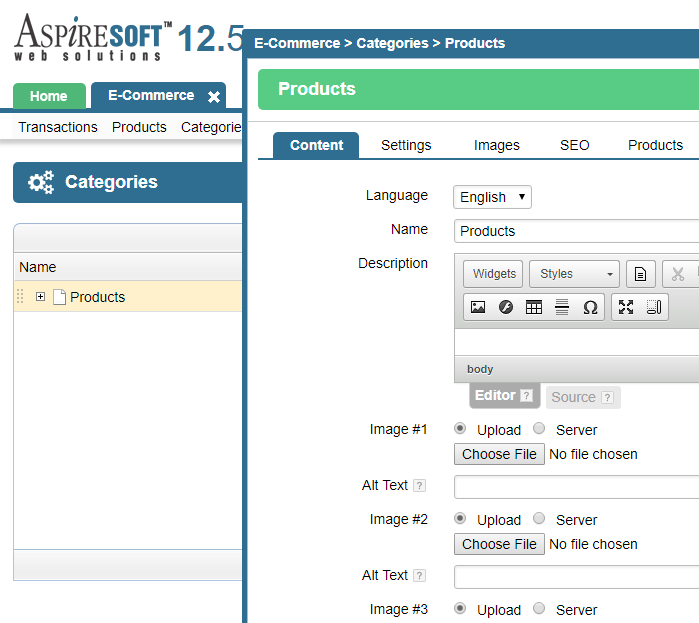
After activating this, new image options will appear in the “Content” tab of a Category's settings tab.
Now, when you open “E-commerce” module, click on a “Categories” tab, double click on any category, you will see options for image uploading in the “Content” tab. Read how to edit categories in this article.
The fact that your images are language dependent now doesn't automatically mean that you have to use it. You can keep using image uploader in "Images" tab as before and those will appear for each language.
Image Label
By default in category settings you have four images "Image #1", "Image #2", "Image #3" and "Image #4". These labels are generic. If you use more than one category image (for example to get a slideshow or add images for different resolutions), you can name it differently, so it makes more sense to you. For example: "Desktop Image", "Tablet Image", "Mobile Image").
After saving those changes by clicking the "Save" button, you can open the "E-commerce" module, click on the "Categories" tab, double click on any category and then on "Images" tab to see your changes.
If you had activated "Language Dependent Images", new labels will be applied in "Content" tab as well.
Image Description
You can add some description to the image section, this is only for your reference and can be left empty.
Custom Fields
You can add fields of any type to your categories ("Image", "checkbox", "dropdown" etc.).
Add new field
To create a new field, click the "Add new" button on the top right of the popup.
Another popup will open and it will have the following fields:
- "Name" - this is just the name of your field. Feel free to name it in a way that makes sense to you and your website's editors.
- "Description" - you can add more details about your field if you need.
- "Design ID" - this field is the unique identifier of your field. You can't use spaces or special characters here. Only Aa-Zz letters, numbers and underscore symbol. Please be consistent when using it.
- "Data Type" - select the type for the field. E.g. "checkbox". (You have probably noticed that "Data Type" field has some limited amount of options. There is a large variety of options that you can add to this dropdown: your own dropdowns, radio buttons etc.. Read this article to check how "Data Types" work.
- "Status" - this checkbox defines if your field is active or not.
- "Localizable" - if you want values of this field to be translatable, choose "Localizable". If not - "Non Localizable". It's very important that you choose this option carefully, as changes to this in the future can be complicated. If there is data already present in some field which was non-localizable before, you will need to contact support to help you migrate the data in the database to the correct language.
Dont' forget to save your changes by clicking the large green "Save" button.
After making changes your new fields will appear in the list.
Please send us suggestions regarding this documentation page
If you would like to recommend improvements to this page, please leave a suggestion for the documentation team.