UPS Shipping Setup
UPS is a default option that you can see under the shipping methods section of e-commerce setup. See below to understand how to set this up.
Sign Up for a UPS Account
Create your user account with UPS here and then go to the UPS Developer Kit.
Follow the steps under "How to Get Started".
Make note of the access key mentioned in step 5.
Setting up UPS for your Website
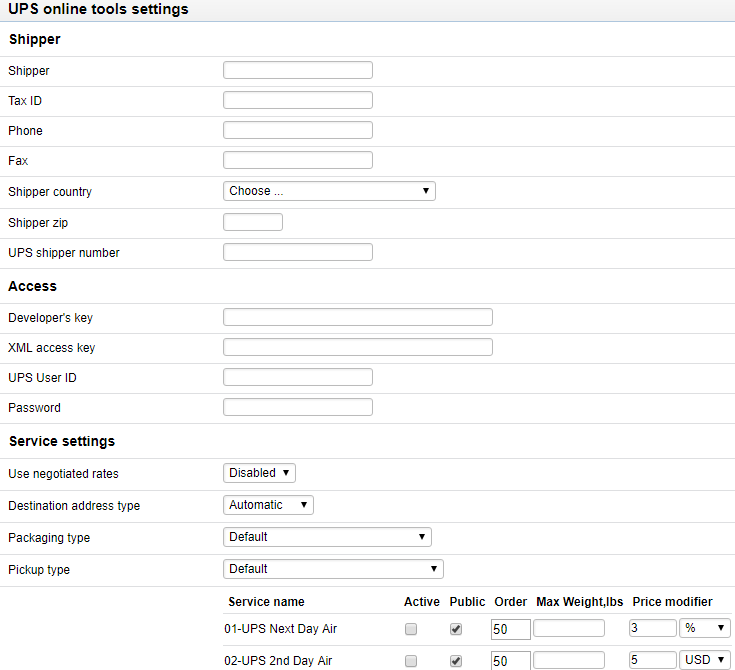
Go to E-commerce > Setup > Shipping Methods > UPS.
Click the edit icon for UPS.
Add the following details to your account:
- Shipper
- Tax ID
- Phone
- Fax
- Shipper Country
- Shipper zip
- UPS shipper number
- Developer's key
- XML access key
- UPS User ID
- Password
- Choose the service settings as per your needs:
- Negotiated rates - enable if you have negotiated rates with UPS
- Destination address type - choose residential to avoid paying extra in case an address is not a business address.
- Packaging type: Package
- Pickup Type: Daily Pickup
- Services: make active and public as per what you'd like to have on your website.
You can use the price modifier field to add any additional fees for handling to the price of the shipping.
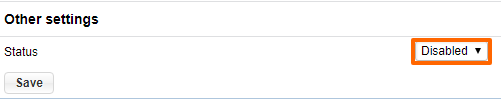
Status: select as "Disabled" if you want to manually add conditions to the shipping option (the conditions can be something like using only UPS Standard for Hawaii and Alaska instead of all the options that may show by default from UPS).
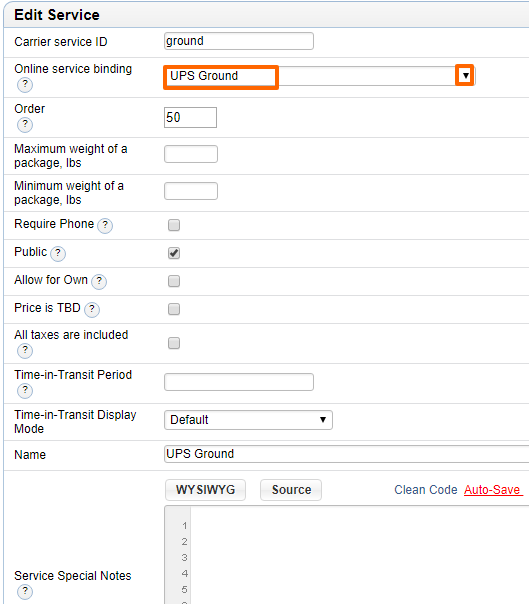
You can then add a manual option and link it to the appropriate UPS service. See here for more.
The UPS tracking URL can be set in order to have a clickable link in the email to the customer. Add the following to the "Tracking URL" setting for UPS in order to activate this feature: https://wwwapps.ups.com/WebTracking?tracknum=${trackingNumber}
Please send us suggestions regarding this documentation page
If you would like to recommend improvements to this page, please leave a suggestion for the documentation team.