Manual Shipping
When an already integrated shipping option is enabled, it allows shipping to every address in the world that the service ships to. However, if you only want to ship to the USA for instance, then you'll need to make use of the manual shipping option.
Customizing Options for USPS or UPS
Let's say you'd like to use USPS just for orders to the USA and UPS for orders to Canada.
To do this, you'd first need to disable the US Post option where the provider is USPS Web Tools V4. Leave the rest of the settings intact like in the example below.

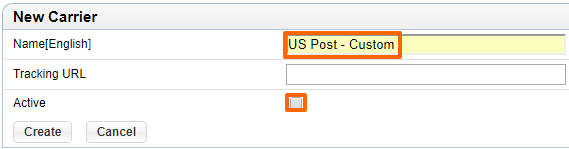
Then go back to the shipping carriers menu and add in the new carrier that you will use to connect the active services to:
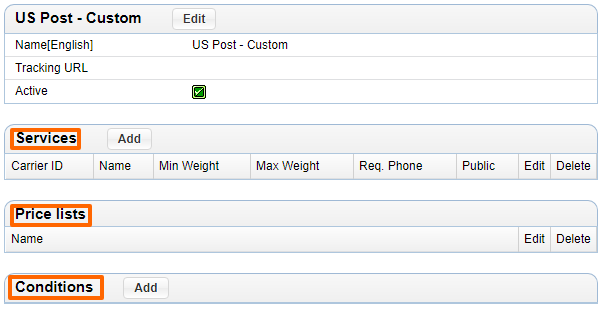
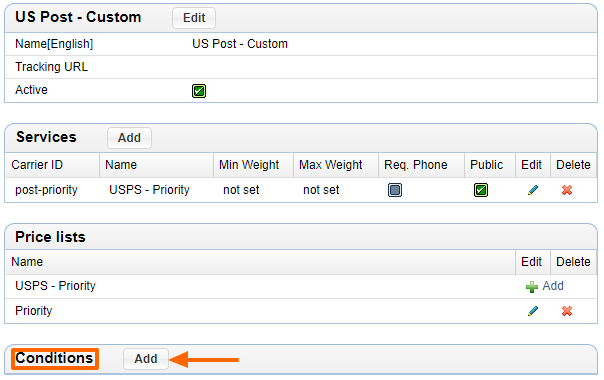
After it's created, click the edit button to get a screen like the below where you can add settings for each section. The Price lists section will become editable once you add in a Service.
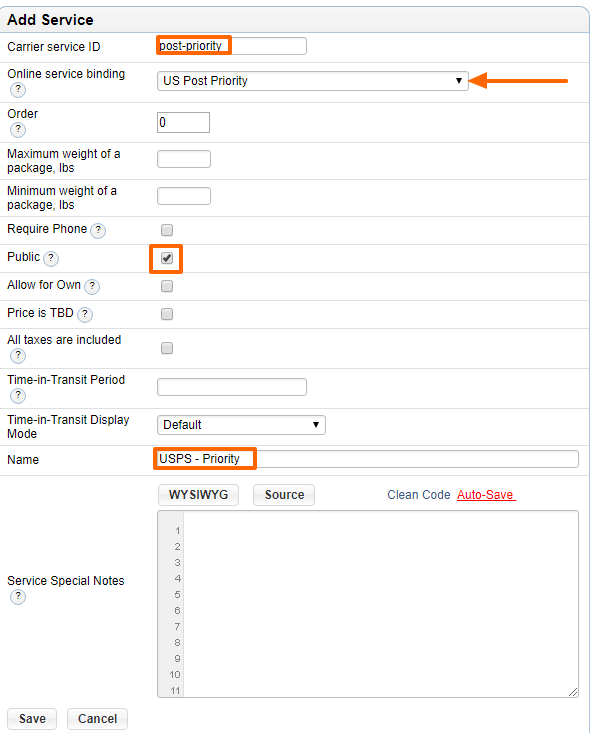
First add the Services that you'd like to include for this carrier. E.g. US Post Priority, which you can choose from the dropdown options of the "Online service binding" field. Choosing an online service means that the shipping prices shown to the user will be what are sent from the carrier, in this case US Post Priority. If this was a setup for UPS, you would choose one of the UPS options here. Also note that you can choose to have the option "No binding", in which case the option will use the pricing grid that you will set in the Price Lists section.
The Carrier Service ID can be anything you'd like. This field is not shown on the website.
Make it "Public" to show it as an option on the website
Give the service an appropriate name so it's easy for users to see what it is.
Hit Save when you're done.
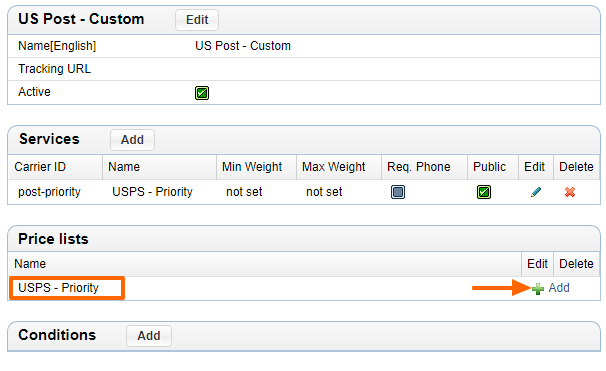
Your screen should now resemble the below with the new service you just added also showing as an option in the Price Lists section. Click Add to put in the pricing details.
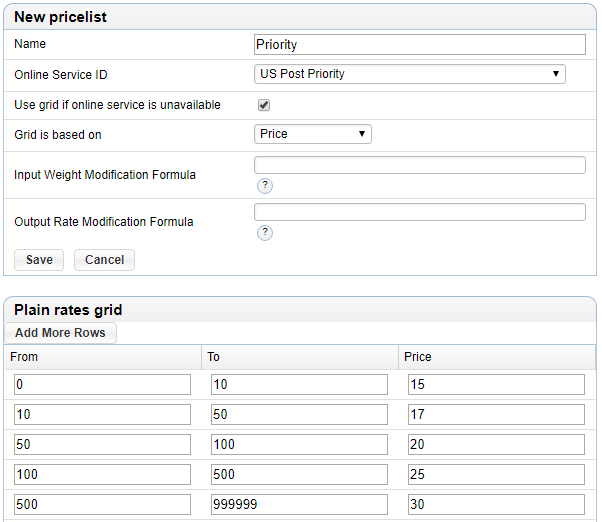
You will see a screen similar to the below. Choose the name - this will show in conjunction with the Service name, so it should again be something that makes sense. Choose the online service id again here to keep the bound to a give service.
The checkbox for "use grid if online service is unavailable" is a good one to check so your users can proceed with their checkout in the rare chance that USPS is not able to send the rates to us. You can base the grid on price or weight, so choose what is relevant to you.
Regarding the grid, make sure the number in the "To" column matches the number in the "From" column in the next row so there is no scenario when a price would not have shipping. The number in the "To" column is not included, for the row that it is in.
Once you hit Save on the Price list, the next step is to add in the conditions:
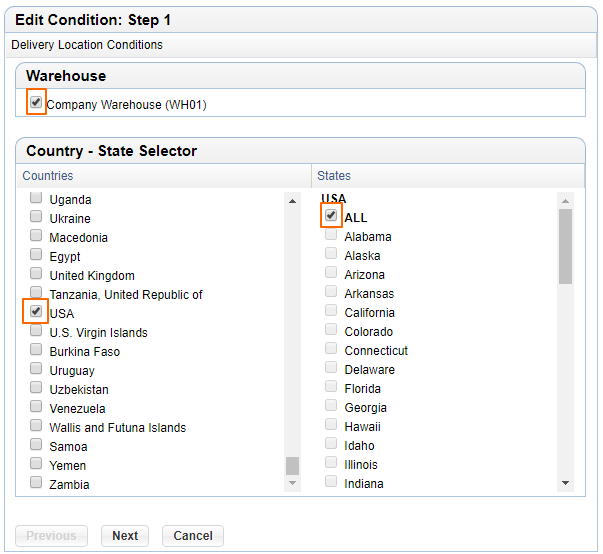
You will then start Step 1 of a 4-step process.
First, select the warehouse that will be used to calcuate the "from" shippig address. The country selector let's you select the country/countries for which this shipping method will be an option. You can further filter the countries to include all or just a few of the states. By default, the system selects all the states. See the example below for USA.
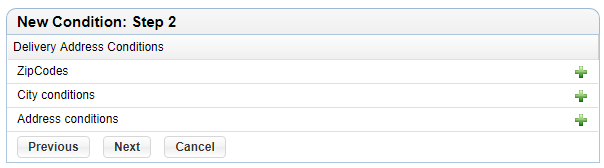
In the second step, you can add conditions for specific zip codes, cities, or for specific addresses. This is an advanced setting and you can simply ignore this for your setup unless you have some unique needs where you don't want to ship to specific zip codes of cities for instance.
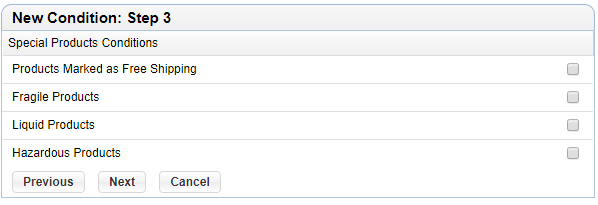
The third step defines conditions for the settings that you may check on products' details' tab in the admin. You may have a shipping option just for specific types of prodcts - e.g. products marked as Fragile Products, in which case you can click the appropriate checkbox in this step. If you don't want to add this condition for specific product settings, just hit Next without checking any option.
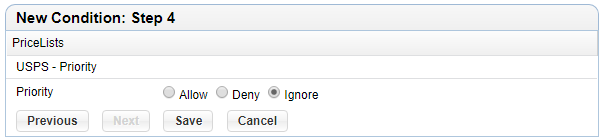
The last step is about selecting the shipping option for the options you chose in the previous steps. Here you will see all the available shipping options that you can choose to allow, deny or ignore. The option to "Allow" is quite straightforward, however, Deny and Ignore need to be understood in more details.
Deny - this option negates any previously set "Allow" for the same country / conditions.
Ignore - this option is ignored, it doesn't have any affect on any other shipping conditions set previously.
Note that when showing shipping options to users, the "Deny" conditions take precedence over "Allow", so choose the options carefully at this step and hit Save when you're done.
You can add more conditions to this carrier option for Canada for instance, where we will allow Prirority Internatination for Canada and disallow Priority. Below is how the settings will look for such a scenario.
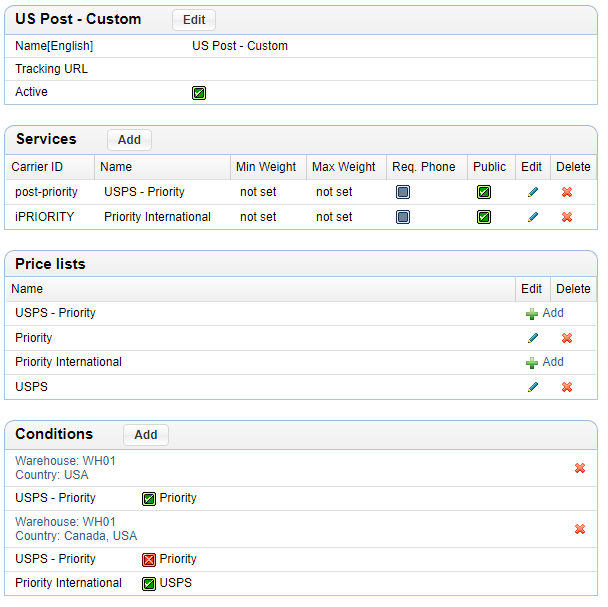
Note that it's best not to mix UPS and USPS options as it's easier to check on settings or add on to settings if they are all in one place for a given carrier.
Just like in the above example, you can similarly create another carrier for UPS and add the different services, pricelists, and conditions.
Remember to always test any change to shipping as it can disrupt the checkout process on your site.
If you have any additional questions, contact us now.
Please send us suggestions regarding this documentation page
If you would like to recommend improvements to this page, please leave a suggestion for the documentation team.