Inventory
You can choose to enable or disable inventory validation on your site via Ecommerce > Setup > Inventory section.

What happens if inventroy validation is disabled?
The website will not check the inventory of products and will allow purchases of products where there is no inventory set or where the inventory is zero.
What happens when you enable inventory validation?
The website will check the inventory levels of all products and only the products that are in stock will be made available for purchase on the website.
If the website has been running for some time and the inventory is enabled afterwards, the system will put all items that were purchased in the past as "reserved", thereby lowering the number of products available for purchase. If you do not want the system to take previous orders into account, you will need to update the inventory through a product import. This wll re-set the inventory to the level that you set and remove all "reserved" items from the inventory count.
You should have the inventory set for all your products before you check the option for "Strick Inventory Validation".
How to Set Inventory on Products
Option 1: Manual
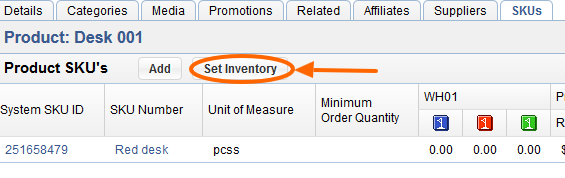
Step 1: Open the SKUs tab of a given product
Go to the product for which you'd like to set the inventory and click on the SKUs tab.

Step 2: Click 'Set Inventory'
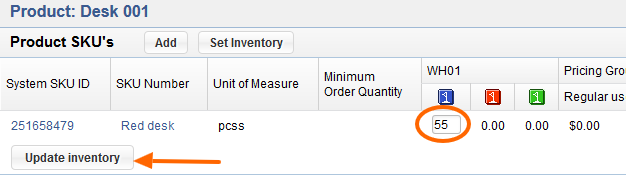
Step 3: Add the inventory available for the given sku and click 'Update Inventory'
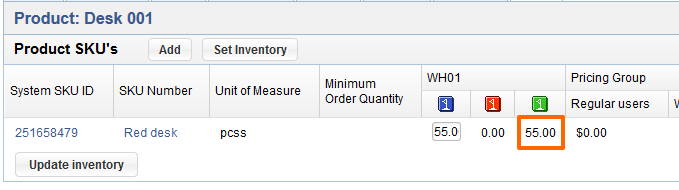
After updating the inventory, the number you entered under the blue flag will get deducted by the amount under the red flag (sold units) and show the total no. of available units under the green flag. In the example, below the red flag does not have any value as it's a new product that hasn't been sold yet, which is why the no. 55 also shows under the green flag.
Option 2: Via Import
This option is used to change the inventory of many or all products at once through an import process.
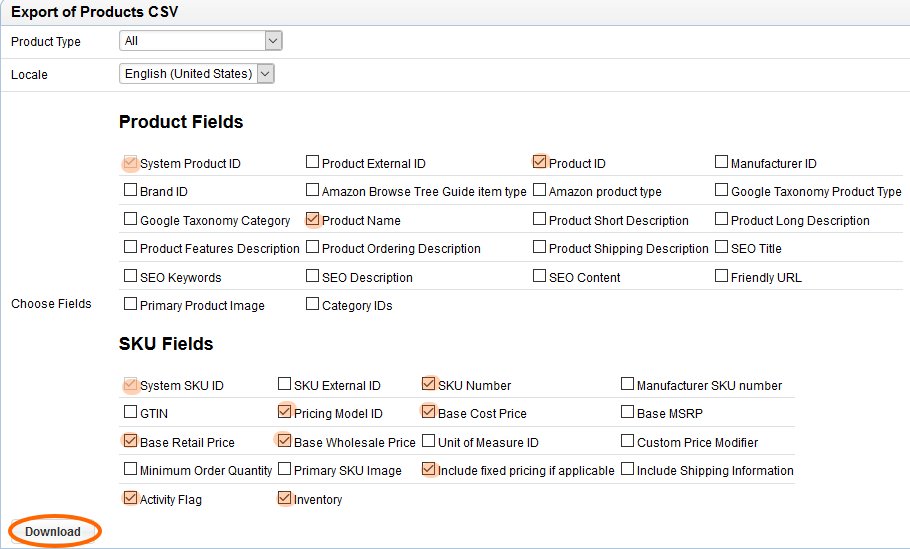
Step 1: Go to Ecommerce > Tools > Import/Export > Export Product (CSV)
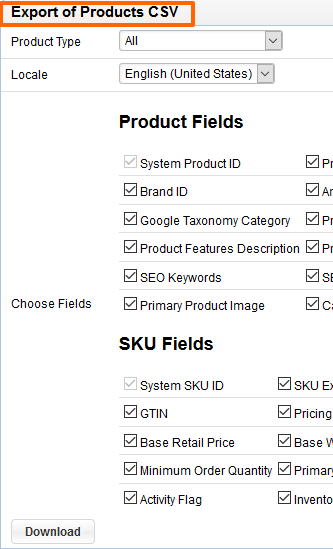
Step 2: Select the fields to include in your file
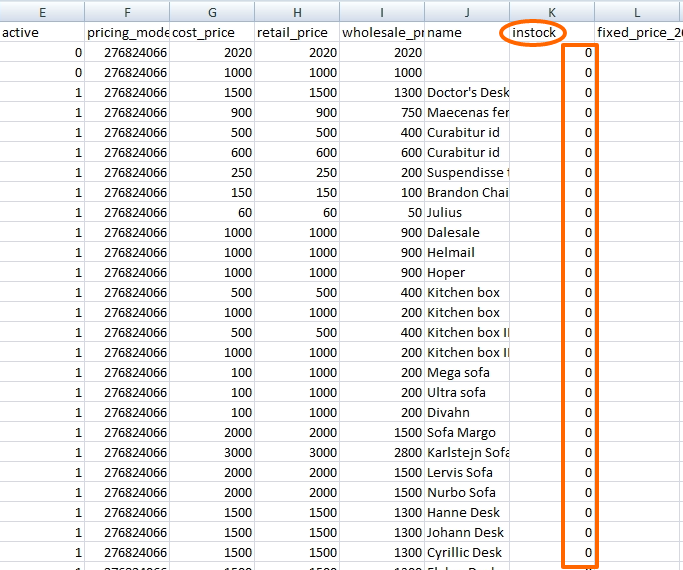
Step 3: Open the file with Microsoft Excel or Open Office Calc. If prompted, please choose the encoding type UTF-8.
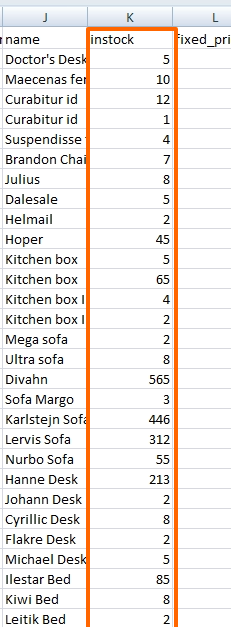
Step 4: Locate the column called "instock" and fill in the inventory level for each item.
Step 5: Save the file as a CSV.
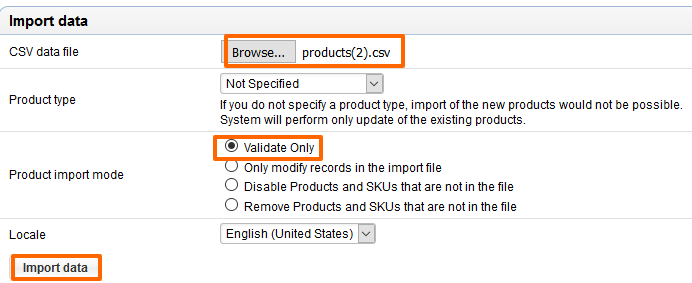
Step 6: Go to Ecommerce > Tools > Import/Export > Import Products (CSV) > Upload a CSV File
Step 7: Select the CSV file you just edited and saved and choose the product import mode to "validate only" to make sure there are no errors in the file. Click Import data.
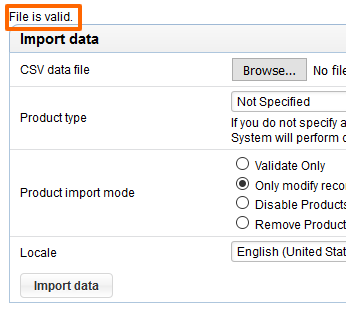
Step 8: If you get any errors on the next screen, please fix those errors in the file as per the explanation given. If there are no errors, you will get a message saying "File is valid." like in the below screenshot:
Step 9:
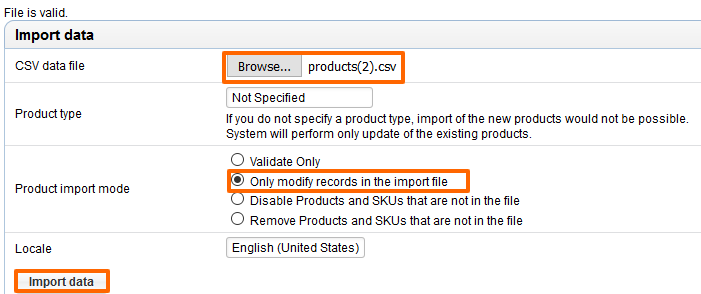
If there are no errors, you can proceed with the same as in step 7, but choosing to "only modify records in the import file" before clicking on 'Import data'.
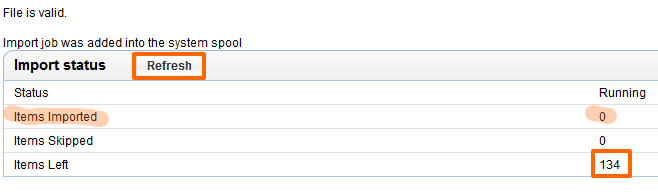
You should see a similar screen like the below - showing that the file is valid, that the import was added to the spool, and a number showing the no. of items left to import. You can check the status by hitting refresh. The import shouldn't take more than a few seconds for less than 200 items. If the items imported number doesn't change even after 5 minutes, please contact support@aspiresoft.com
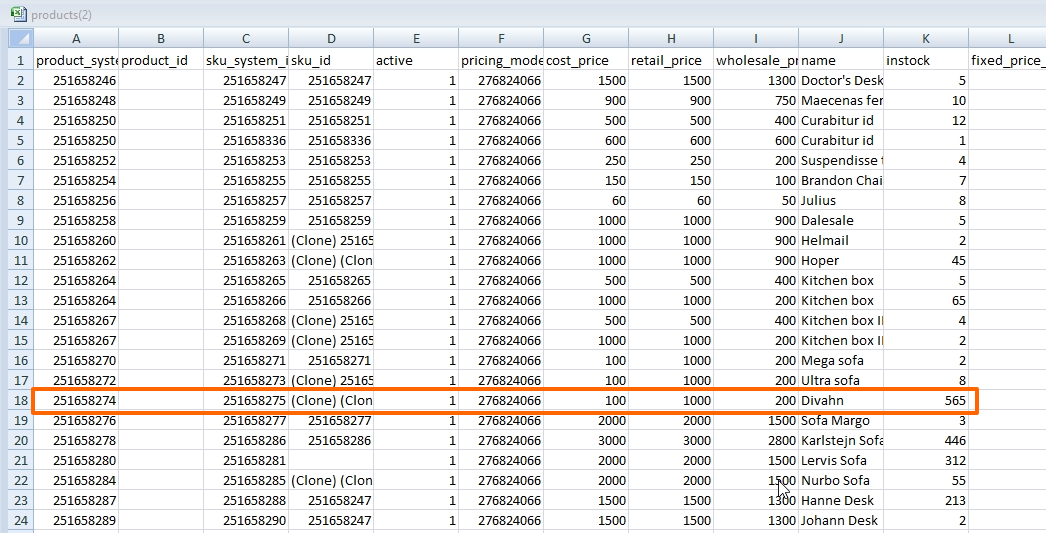
Step 10: Spot check a few items by going to their skus tab and check the number shown in the inventory. It should match what you had entered in the import file.
Example of inventory of a product after import:

Same product in the file:
Please send us suggestions regarding this documentation page
If you would like to recommend improvements to this page, please leave a suggestion for the documentation team.