Edit an Existing Invoice
Once you have selected a particular invoice from the "List of Invoices," you will be able to view all of the relevant information associated with it as well as make the changes needed to keep it as up-to-date as possible.
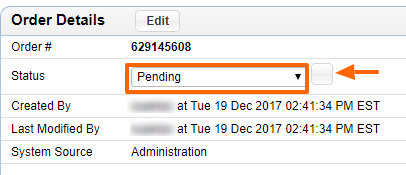
Update Status:
In order to update the order's status to reflect the most recent developments, simply select the desired status from the drop-down menu labeled "Order Status" and click on "Update Status" - this may show as a blank square on some screens like in the below screenshot).
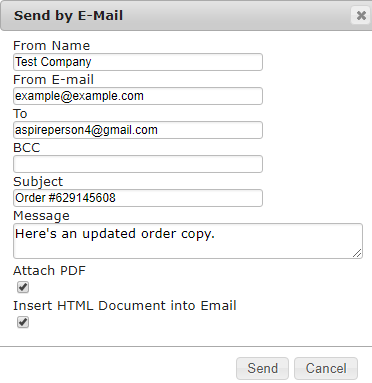
E-mail Sending:
In order to send an email to the customer who placed the order, for instance, to confirm that the order has been successfully received or to provide a copy of the invoice, simply select the desired email template from the drop-down menu highlighted in orange below, and click on "Send by E-mail".
The desired email template will be automatically filled in with the specifics of the customer and order in question, and then sent to the email address listed in the customer's details. You can even add some custom message or change the email address of where to send the confirmation to.
Edit Shipping/Billing Address and/or Shipping Method:
In order to edit the address to which the ordered product(s) will be sent, simply click on the "Edit" icon within the "Shipping Address" field and modify the address as desired. The same can be done for the billing address, to which the invoice for the order will be sent.
In order to change the method by which the product and invoice will be sent to these addresses, you can click on the "Edit" icon in the "Shipping Method" field, and from the available options, specified within the module's Setup, select the desired method of shipment. If you do not see a shipping option, check your Shipping methods' setup under Ecommerce > Setup > Shipping Methods.
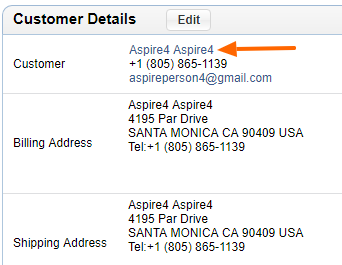
Jump to CRM:
By clicking on the customer's name, you can view the customer's complete profile within the CRM (Contact Relationship Management) system. Should you wish to modify any of the customer's information, such as his/her name or contact details, this can be done here, within the CRM profile, and the order will be updated to reflect the changes made.
View Order:
In order to view the current order for the invoice, click the order number.
See here on how to add more items to an order/invoice.
Create New Payment:
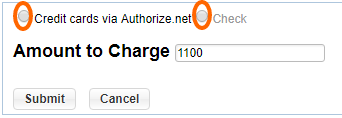
Should you wish to create a new payment, click on the "Create New Payment" icon in the upper left-hand corner of the "Payments" table.

In the window that appears, you can enter the amount of money paid by the customer, as well as select which method of payment was used (check, credit, card, etc.). Upon selecting the appropriate payment method, you will be presented with an additional field to fill out with specifics about the payment, such as the credit card number, check number, and whether the money has been received.
Once the details of the payments have been completed, you can check the "Submit" box to bring the order up-to-date with the most recent payment developments.
Should you wish to view, modify, add or remove existing payments, this can be done as well, by simply clicking on the appropriate icons within the desired payment's row of the "Order Payments" table(, and respectively ).
Add Ordered Items:
In case you would like to include additional products on the invoice, click any of the various "Edit" options on the invoice and then click on the "Add Item" icon in the upper left-hand corner of the "Items" table.

You will then be presented with a complete list of all available products in your online store, which you can narrow down in order to find the desired product(s) using the search form at the top of the screen.
Once you have found the desired product, simply click on its name, and it will be added to the order.
Edit Ordered Items:
From the "Edit" state of the invoice, you are free to alter the number of items of each product ordered, as well as price details, such as the shipping cost, taxes, and the unit price of each product.
Once you have modified the invoice's various details as desired, just click on the "Save" button at the bottom of the screen, and the system will be brought up-to-date with the changes made.
Please send us suggestions regarding this documentation page
If you would like to recommend improvements to this page, please leave a suggestion for the documentation team.