Affiliate Settings
By clicking on the "Edit" icon next to a particular affiliate's name in the "Affiliates" tab, you will be taken to a window labeled "Affiliate Settings," where you can manage the specifics relating to the contact's affiliate status.

Affiliate Settings:
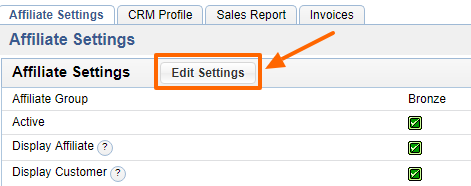
First of all, by clicking on the "Edit Settings" icon found in the upper-most table, labeled "Affiliate Settings," you can select a group to add the affiliate to in order to determine what types of discounts or benefits they should receive.
You will also have the opportunity to control the affiliate's status, using the "Active" check-box to select whether or not the contact should currently be receiving affiliate benefits.
For more information on how to create and use affiliate groups, please see our section on affiliate groups.

Activation Methods
There are three ways to trigger an affiliate when a user makes a purchase.
1) URL Activation
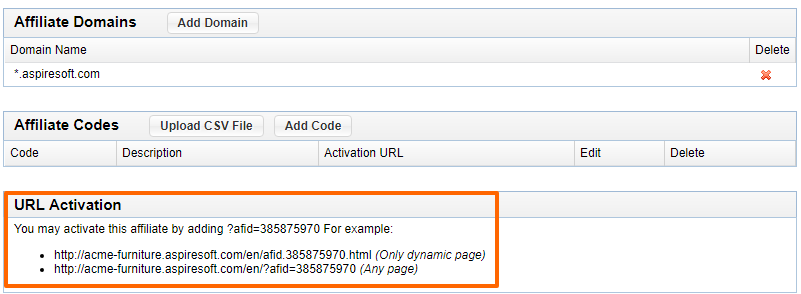
An affiliate can get credit for referring a client by adding an affiliate variable to the end of any links they point to your site. For example, www.acme-furniture.com is the home page of the target site. When an affiliate wants to make a link to this site and make sure he gets credit as an affiliate, he would add his affiliate id to the end of the url. This code is found in the Affiliates account and the end result would look something like this. www.acme-furniture.com/?afid="234234243". This variable ?afid="234234243" is unique to one affiliate and must be added to every link pointing to your site for them to get credit.
2) Affiliate Domains
The simplest method of activating the affiliate is to add the domain name of the affiliate site in the administration. Once this has been completed the affiliate does not need to do anything else other than to make links that point to your pages. Keep in mind that you must moderate the addition of domains, for one rogue affiliate could add a domain of a site that they do now own.
In the next table, labeled "Affiliate Domains," you can further control the affiliate's details by specifying which of your company's web domains they should receive the benefits on.
In order to add a new domain, simply click on the "Add Domain" icon and enter the desired domain name into the provided field.
Should you wish to remove a particular domain, so that the contact will no longer receive special affiliate status when using it, simply click on the "Delete" icon located within that domain's row of the "Affiliate Domains" table.

3) Affiliate Codes
The third method is where the user will type the affiliate code on the website when registering. An example of when this would be used is when a sales person leaves a business card with a prospective client. On that card is his affiliate code. The sales person would ask the user to please enter his code when they register so that he will get credit for any sales they make.
By clicking on the "Add Code" icon in the third table, labeled "Affiliate Codes," you can also add a codename for the affiliate in order to make managing affiliates easier in the future.
In order to remove a code, simply click on the "Delete" icon in that code's row of the table.

Please send us suggestions regarding this documentation page
If you would like to recommend improvements to this page, please leave a suggestion for the documentation team.

