Create a New Form
In order to create a new form, simply access the Forms module.
Clone an Existing Form or Create a New One
You then have 2 options:
Option 1 - Clone an Existing Form
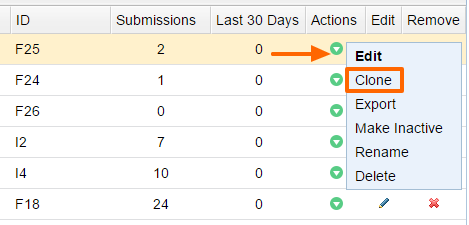
A quick and easy way to create a form is to clone an existing form using the "Clone" option under "Actions" of an existing form. Tweak the form as needed via the different tabs - Fields, Layout, and settings. If there are auto-responders or any other settings on the original form that need to be changed on the new form, then those will also need to be edited.
Option 2 - Create a New Form
Step 1: Click on the "Add new form" icon, as indicated in the picture below.

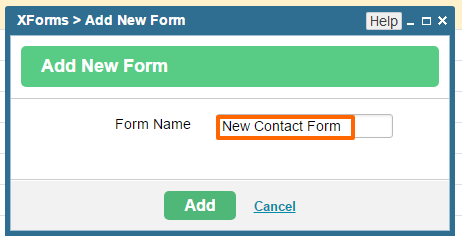
Step 2: Give the form a name:
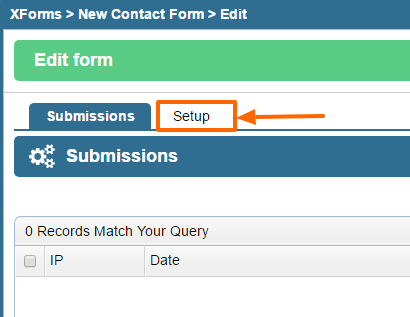
Step 3: Your new form is now created. Click on the Setup tab of the next screen.
Step 4: Click on the Fields tab to add fields such as first name, last name, etc...Then click "Add new".

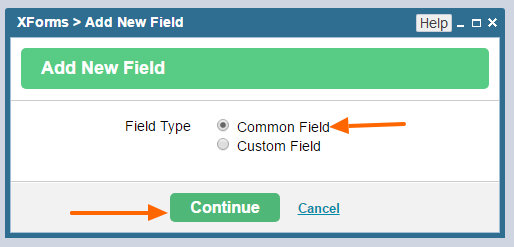
Step 5: You will be given a choice to select common or custom field types. Choose common if you wish to add primarily the following fields - company name, first name, last name, contact information, address, along with a quick note field, then go ahead and choose the common field option:
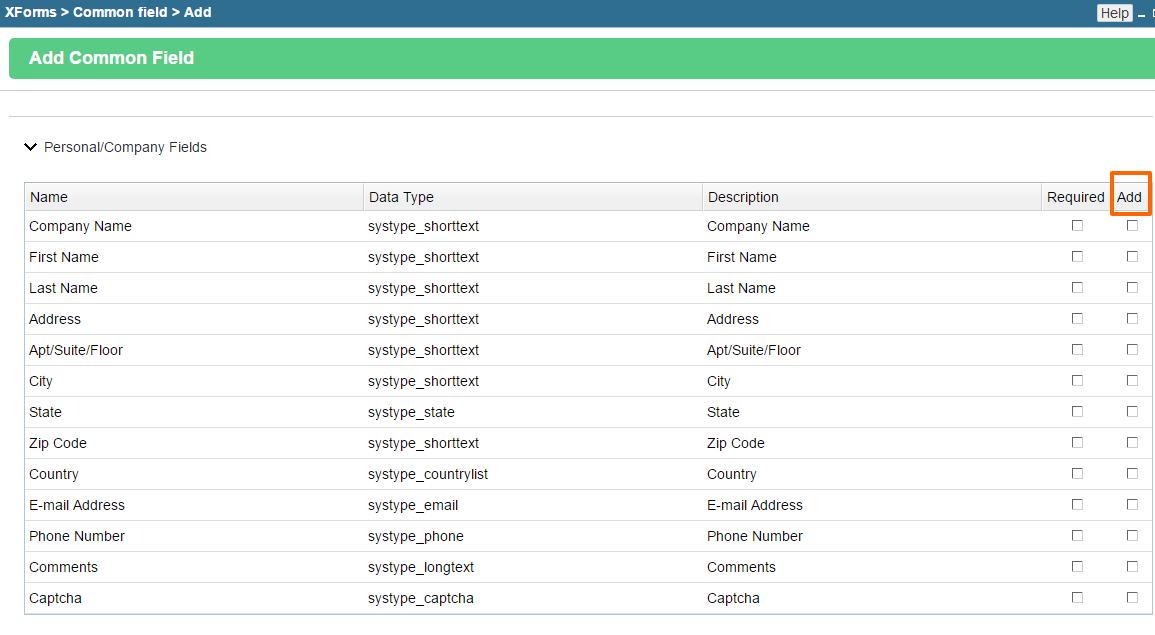
Step 6: Select the fields you'd like to add. You can check the "Required" option for the field that needs to be set as required on the form. This means that the user can not submit the form unless the field(s) marked as required are filled in.
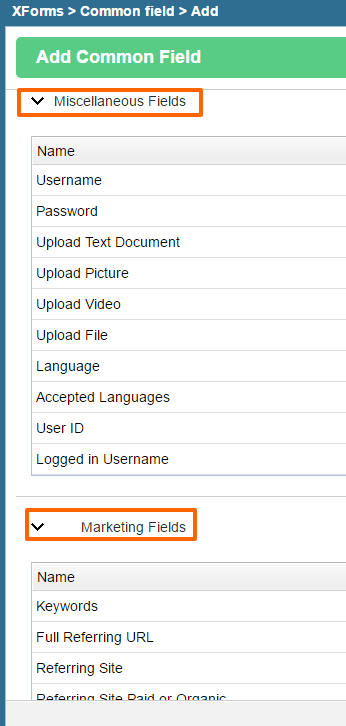
There are many more types of fields below the personal and company fields that you can utilize. The marketing fields will not show to the user, but are hidden fields that will collect data from the user's browser once the submit button is hit on the form page. Please do not mark any of the marketing fields as required since they are not presented to the user to be filled in.
Step 7: Hit Save. You should see the fields you added on the next screen.
Step 8: If you wish to add a new field that you did not find under the "Common Field" option, then click the "Custom Field" option after hitting "Add new".
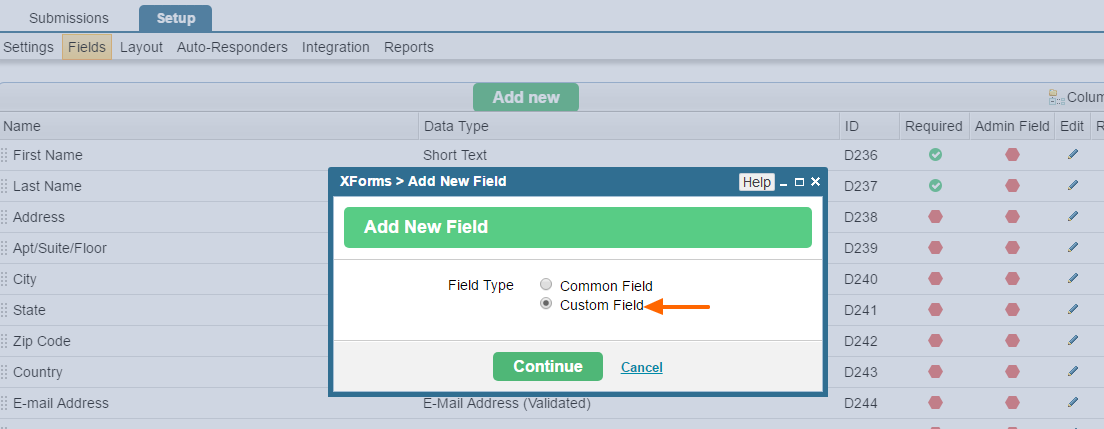
You can then give the new field a name and set its type. Hit Save to add the new field to your form.
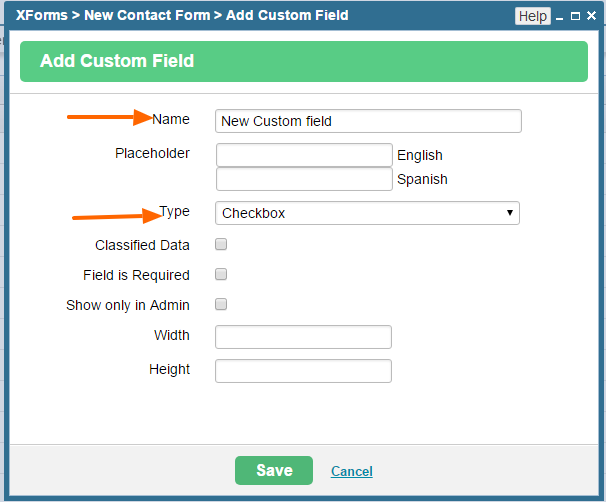
Step 9: Add the Layout.
Go to the Layout tab and choose the "Insert Default Layout" option to have the default layout applied to the fields you added.

Step 10: You should now see your fields in the editor. You can select, cut, and paste the fields elsewhere in the editor if you don't like the order of where they are placed. Make sure to hit Save once you're done editing. If you are familiar with html, you can also edit the layout in the Source editor.
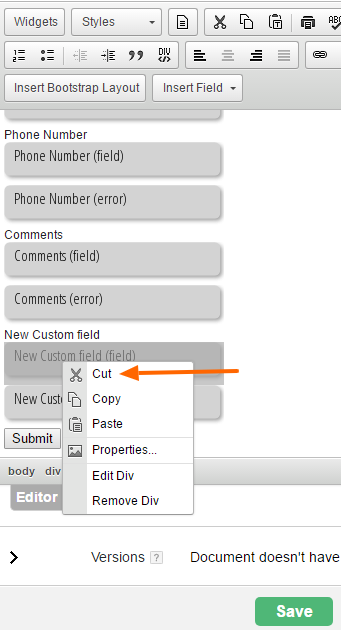
There is also a section for the Thank you Page here, where you can either add some text to show to the user after the form is filled out or redirect the user to a different page on the site after filling out the form. To redirect the user to a different page on the site, use the following line of code in the Source view of the page and replace the url "/thank-you" with any other page where you want the user to go:
<script> $.fn.iPop("/thank-you/"); </script>
Step 11: Add your form to a CMS page.
Open the CMS module from the dashboard.
Select an existing page or add a new page to add the form to. in the example below, we have selected the contact us page. Open the Content tab of the page (default tab that opens when you open the page).
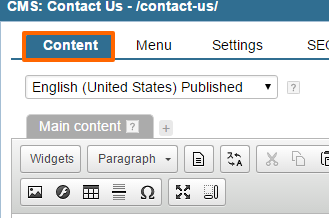
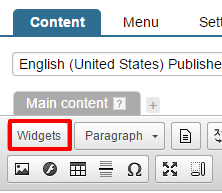
Click the "Widgets" option in the editor.
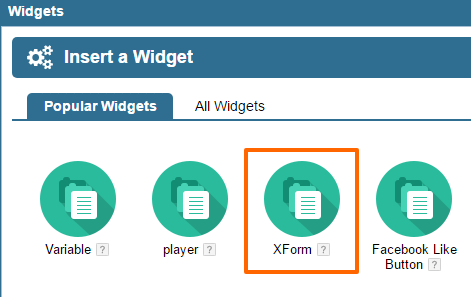
Choose XForm.
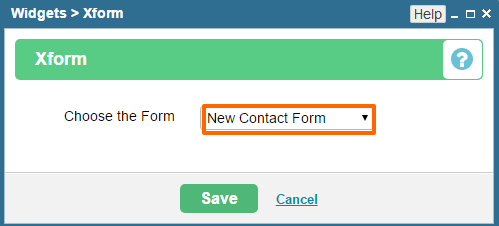
Select your form from the list of dropdowns and hit Save:
Then publish the page to see the form on the website.
Please don't forget to test.
NOTE: Unless you are familiar with HTML and have edited the layout in the Source editor of the form's layout, you might find it hard to get the form to look very presentable. If you require extra styling of the form and for it to adapt to different mobile resolutions, then please get in touch with your contact at AspireSoft so they can do the rest.
Optional Settings
If you wish to receive/send emails after a user fills out and sends a query through the form, you can use the auto-responders section to set up the emails.
Setting up auto-responders:
Step 1: Click the Auto-Responders tab of the Setup and hit the option to "Add New Email" in the upper right corner of the new screen:

Step 2: Add in the details.
Uncheck the Status option so you can activate the option only after you are done with all the settings.
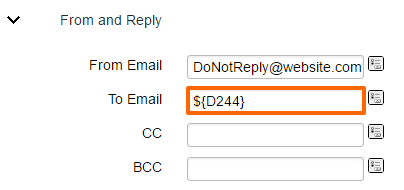
Add the Responder Name, From Email and To Email (click the icon to the right of the field to choose the email field for the "To Email").
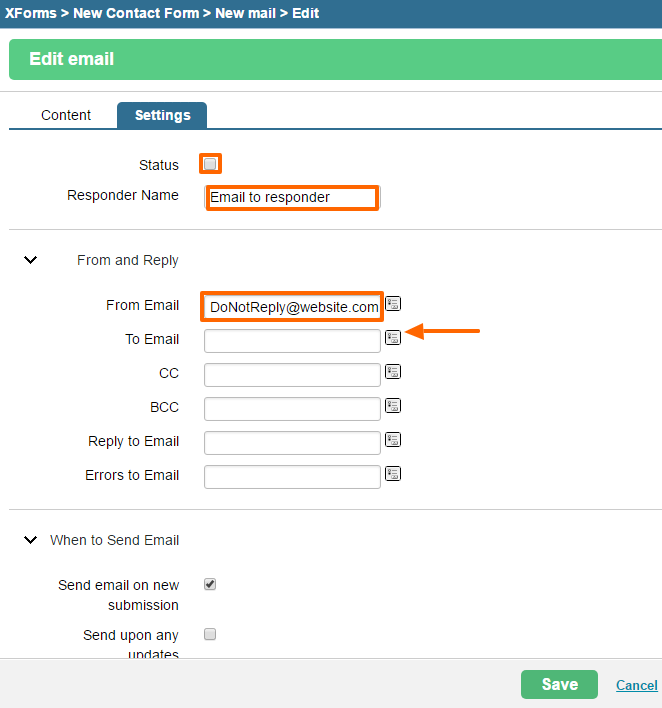
Make sure you select the field that captures the user's email address.
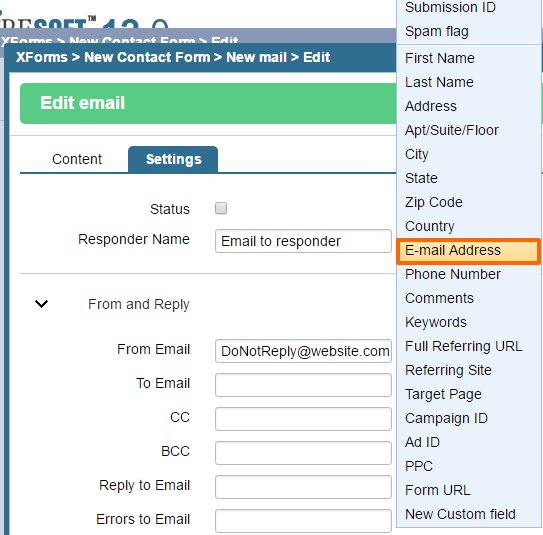
The field should look something like the below after you've chosen it:
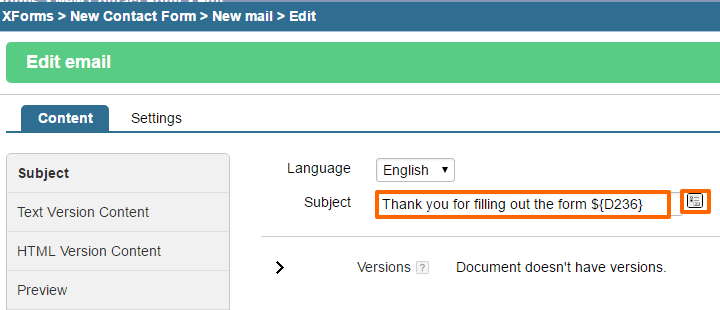
Step 3: Add in the Subject and Content of the email by choosing the Content tab.
You can customize the subject by choosing to add the submitter's first name in the Subject like in the example below:
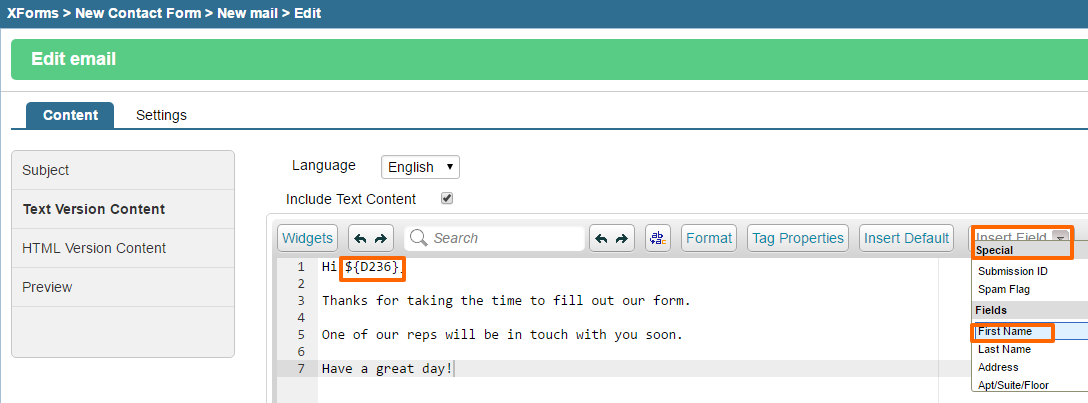
Start typing into the editor. Again, you can personalize the email by using the first name for instance. You can similary add an HTML version too if you wish, but be sure to add the text version as some email clients sometimes block HTML text in incoming emails.
Make sure to hit Save at the end.
Finally, go to the Settings tab and mark the auto-responder as active before testing the submission process on the website.
Please send us suggestions regarding this documentation page
If you would like to recommend improvements to this page, please leave a suggestion for the documentation team.
