Source Editor
The Source editor allows you to view and modify the content of a particular page using HTML code.
For many users, unfamiliar with HTML coding, this editor may not be of use. But for those experienced users of HTML, the Source editor can be a helpful tool, allowing you to troubleshoot and identify problems or inconsistencies by viewing the actual code behind what appears on the page (as displayed within the WYSIWYG editor).
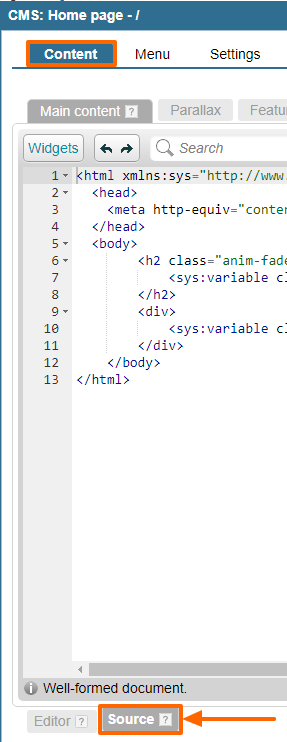
In order to access the Source editor, simply click on the "Edit" icon next to the desired document in the page's "Content" tab. By default, you will be presented with the page in the WYSIWYG editor. In order to move to the Source editor, you can simply click on the "Source" tab at the top of the editing window.

Editing HTML
In the "Source" editor window, if you are familiar with HTML, you can enter tags freely in order to create and alter your page's content.
If you are pasting code from elsewhere, please make sure it is in "Strict xHTML" format. Any other HTML may need to be further formatted for it to work as desired.
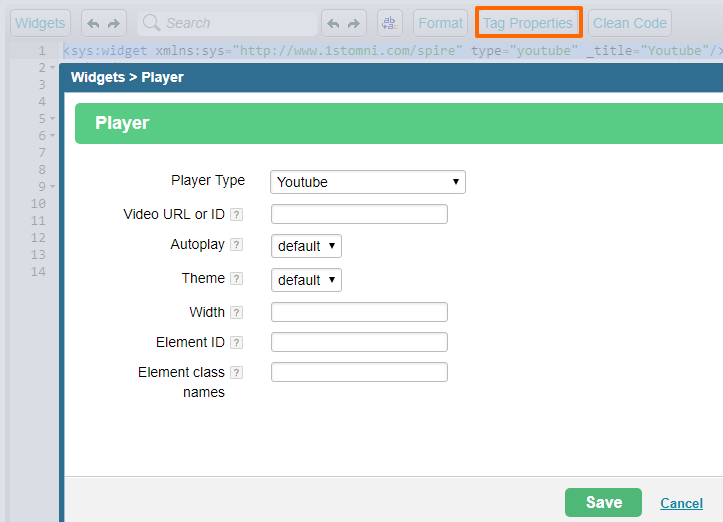
The system widgets that may be on the page can be viewed by selecting the code for the widget and hitting the "Tag Properties". This will allow you to easily edit the options that may be available for a given widget. See the Youtube example below:

Cleaning Source Code
After modifying your page's content in the Source editor, there is a good chance that the code could use some cleaning up, and perhaps even correcting. And as HTML rules are very strict, unless the code is entered exactly in the correct manner, you could have a problem viewing the desired content, formatting, or effects on your actual page.
In order to avoid any problems, you can simply click on the "Clean Code" link, located in the upper right-hand corner of the editing window, when using any of the content editors. Clicking on this link will clean, reformat, and fix mistakes within the document (such as adding ending tags when only starting tags have been entered).

Before these fixes and modifications become permanent, however, you should check to make sure that, in cleaning the code, nothing desired was removed and nothing undesired added, as a small change in code could have major effects on your entire page's content.

After checking, you will have the option to either "Accept Changes" (which will save the newly cleaned version of the HTML page) or "Reject Changes" (which will revert back to the latest version of the page), by clicking on the desired link (both of which will have appeared in place of the "Clean Code" link).
Versions
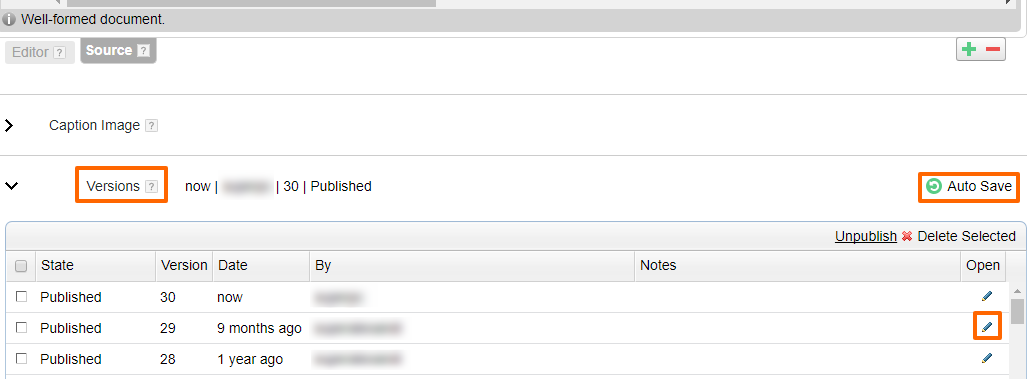
In the bottom of the "Source" editor window, just as in the bottom of the WYSIWYG editor, you will see the "Versions" section with the page's current revision number.
By clicking on the Versions, you can view a complete list of every version of the page that has been saved and/or published.
In order to view one of these previous versions, simply click on the pencil icon for the version you wish to see and it will appear in the editing window.
Should you decide that you would like to revert to this previous version, simply click "Publish", and it will replace the version of the page that is currently displayed on your website.

Auto-Save
The Auto Save option below the editor keeps a more recent history of the changes you may have made. This option comes in handy when for instance you close the window without saving your changes or you lose internet connection before saving.
Just click on "Auto Save" to see the versions that were automatically saved by the editor. Generally, the auto-save option keeps saving the content every minute and resets as soon as save a draft or publish the page.

Please send us suggestions regarding this documentation page
If you would like to recommend improvements to this page, please leave a suggestion for the documentation team.
