Cut, Copy, Paste, Print & Spell Check
To cut a text fragment, start with selecting it. When the text is selected, you can cut it using one of the following methods:
- Press the [Cut] button on the toolbar.
- Open the editor context menu for the selected fragment by pressing the right mouse button, theMenu/Application key, or the Shift+F10 keyboard shortcut, and choose the Cut command.
- Use the Ctrl+X shortcut on your keyboard. Note this method works even when the browser blocks the toolbar's access to the clipboard, so this is the most reliable way of cutting the text.
To copy a text fragment, start with selecting it. When the text is selected, you can copy it using one of the following methods:
- Press the copy button on the toolbar.
- Open the editor context menu for the selected fragment by pressing the right mouse button, the Menu/Application key, or the Shift+F10 keyboard shortcut, and choose the Copy command.
- Use the Ctrl+C shortcut on your keyboard. Note this method works even when the browser blocks the toolbar's access to the clipboard, so this is the most reliable way of copying the text.
To paste a text fragment, start with cutting it or copying from another source. Depending on the security settings of your browser, you may either paste directly from the clipboard or use the Paste dialog window.
When the text is in the clipboard, you can paste it using one of the following methods:
- Press the Paste button on the toolbar.
- Open the editor context menu for the selected fragment by pressing the right mouse button, the Menu/Application key, or the Shift+F10 keyboard shortcut, and choose the Paste command.
- Use the Ctrl+V shortcut on your keyboard. Note this method works even when the browser blocks the toolbar's access to the clipboard, so this is the most reliable way of pasting the text.
After choosing paste, you will see this dialog window. Here you need to choose if you will paste the content as text or with styles.
Important Note: Pasting with styles should only be done when pasting text after copying content from another part of your website. If you have copied content from any other source such as Microsoft Word, or another website, paste as Plain Text. Failure to do this will create content that has inline styles that can be in conflict with your website styles.

Printing a Document
To print the document, press the Print button on the toolbar. The standard printing pop-up window of your operating system will appear and you will be able to choose the printer as well as all relevant options.
Print window in Windows operating system
Depending on the type and version of the operating system in use (Windows, Linux, Mac) you should be able to at least choose a number of copies and a page range (varying from a selection of the text to a list of pages).
The editor comes integrated with a spell checking solution provided by WebSpellChecker.net. Spell checking makes it easier to keep the language of the text clean and helps to eliminate typographical errors (typos). The built-in solution also contains a thesaurus that allows you to search for synonyms and thus avoid repetitions in your document.
Please note that the free spell checking solution provided by WebSpellChecker.net is advertisement-supported. To remove the ads, you need to buy a license. For licensing terms check the WebSpellChecker.net website.
Spell checking in the editor comes in two flavors. First solution is the Spell Check As You Type (SCAYT) option that checks the spelling of the text in the editing area immediately as you type it and marks all errors with a red wavy line. The second one lets you open the Spell Check dialog window and check the spelling of the document word by word. Additionally, for some languages a Thesaurus feature is also available.
Spell Check As You Type
Spell Check As You Type (SCAYT) is a convenient option that lets you control the correctness of your document at the same time that you are writing it. SCAYT checks the text immediately after you write it and when it finds an error, it marks it with a red wavy line underneath the misspelled word.
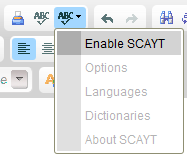
By default SCAYT is disabled. If you want to turn it on, press the  toolbar button, and select the Enable SCAYT option from the menu that opens.
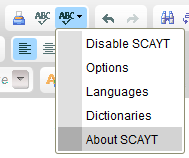
After you enable SCAYT, more menu options become active. Each menu option opens a Spell Check As You Type dialog window with an appropriate tab.
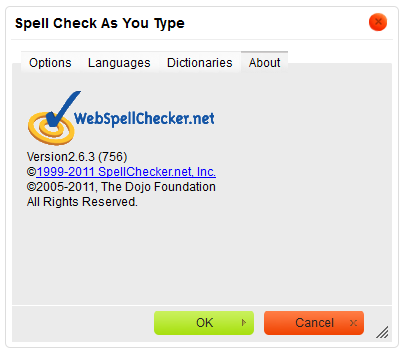
To get more information about the Spell Check As You Type solution, select the About SCAYT option from the menu.
Apart from the SCAYT provider you will be able to learn about the version of the solution as well as see a copyright note.
Options
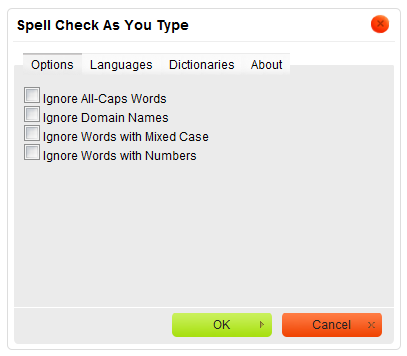
If needed, you can customize the Spell Check As You Type feature to your needs. To do this, press the  toolbar button and select the Optionsmenu option. The Options tab of the Spell Check As You Type dialog window that will open lets you configure SCAYT
settings.
The following options can be selected in SCAYT:
- Ignore All-Caps Words – the spelling of words written in capital letters will not be checked.
- Ignore Domain Names – the spelling of website addresses will not be checked.
- Ignore Words with Mixed Case – the spelling of words written with a mixture of lowercase and uppercase characters will not be checked.
- Ignore Words with Numbers – the spelling of words that contain numbers will not be checked.
When you are happy with your settings, click the  button to return to the editor editing area. The settings will automatically be applied to the whole text.
Languages
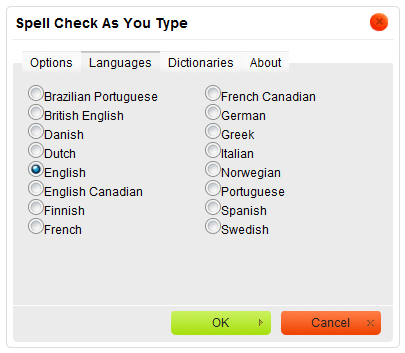
The spell checking feature works for numerous languages. By default the text that you write is assumed to be in English, but you can switch the spell checking engine to any of the supported languages. To do this, press the  toolbar button and select the Languages menu option.
The Languages tab of the Spell Check As You Type dialog window that will open lets you select the text language.
Currently the following languages and dialects are supported by WebSpellChecker.net: Brazilian Portuguese, British English, Danish, Dutch, English, English Canadian, Finnish, French, French Canadian, German, Greek, Italian, Norwegian, Portuguese, Spanish, Swedish.
To specify the language of your text, select the radio button next to the language name and click the  button to return to the editor editing area. The spellchecker will automatically treat your text as written in a language specified above.
Dictionaries
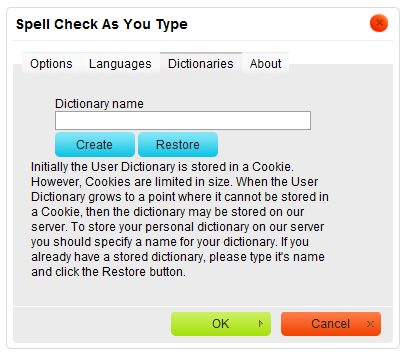
Dictionaries store items added to the spellchecker by the user. Initially the user dictionary is stored in a cookie of your browser. However, cookies are limited in size. When the user dictionary grows to a point where it can no longer be stored in a cookie, the dictionary may be stored on the WebSpellChecker.net server.
To create or select a server-based dictionary, press the  toolbar button and select the Dictionaries menu option. The Dictionaries tab of the Spell Check As You Type dialog window that will open lets you create, delete, or restore the user dictionary.
To store your personal dictionary on the server, specify a name for the dictionary and click the Create button. If you already have a stored dictionary, type its name and click the Restore button. To delete the already existing dictionary, type its name and click the Delete button.
Using Spell Check As You Type
Once you enabled the Spell Check As You Type feature and configured its options, you can use it to improve and correct the text written in the editoreditingarea.
Suppose we write the following sample text in the editor:
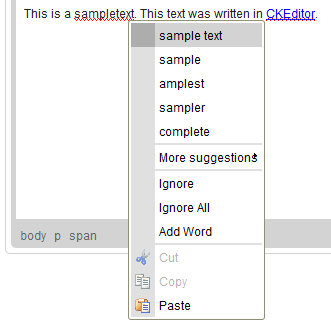
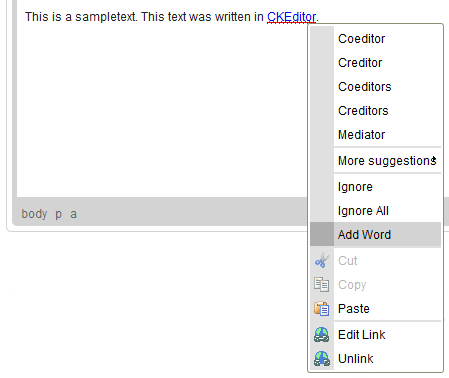
SCAYT marked two phrases as errors. The first one, "sampletext", is missing the space between what should be two separate words. We can easily fix it by placing the cursor anywhere inside the phrase and opening the context menu with the right mouse button or the Menu/Application key on your keyboard. Once SCAYT is
enabled, the context menu will contain spellchecker suggestions on how to correct the error.
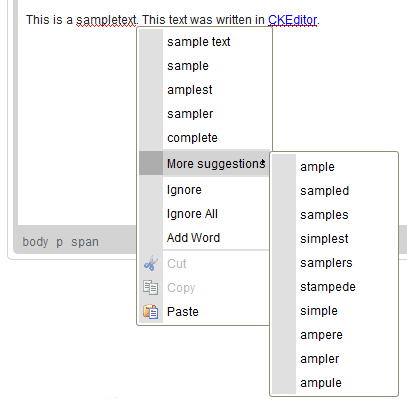
When you are happy with one of the suggestions, select it with your mouse and the phrase will automatically be corrected in the editor editing area. If, however, none of the suggestions visible in the context menu matches what you were intending to write, check the More suggestions context menu option for more suggestions.
The second phrase marked by the spellchecker as an error is the "the editor" name. Since it is a correct word and not an error, we may ask the spellchecker to ignore it. To do this, place the cursor inside the word and select the Ignore option from the context menu. To ignore all occurrences of the word in this text, use the Ignore All function.
Since "the editor" is a valid proper name that we are bound to use more often, we may add it to our user dictionary in order to avoid marking the word as error in the future. To do this, place the cursor anywhere inside the phrase, open the context menu, and select the Add Word option.
This will add the word to your user dictionary and it will no longer be marked as error when used in your documents.
Spellchecker
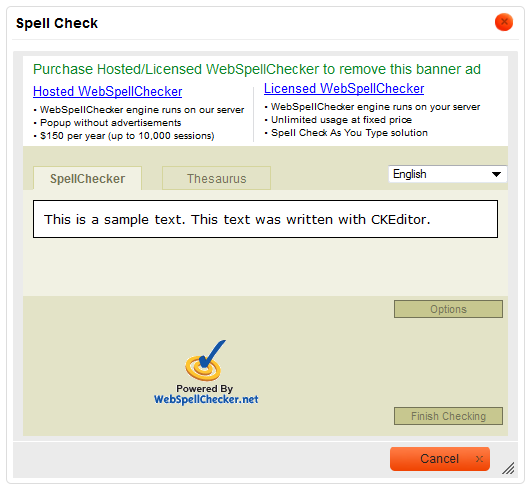
To check the spelling of a text that you wrote in the editor, press the  toolbar button. The Spell Check dialog window that will open lets you go through the text from one error to another.
The spell checking function can be configured and employed via the SpellChecker tab of the Spell Check dialog window. It guides you through the text and lets you review all phrases that are marked as errors. It can also be used to set the document language and a few configuration options.
Spellchecker Settings
If your document is written in a language other than the default English, select a proper one from the drop-down list on the right side of the dialog window. Currently the following languages and dialects are supported by the spellchecker: Brazilian Portuguese, British English, Danish, Dutch, English, English Australian, English Canadian, Finnish, French, French Canadian, German, Greek, Italian, Norwegian, Portuguese, Spanish, Swedish.
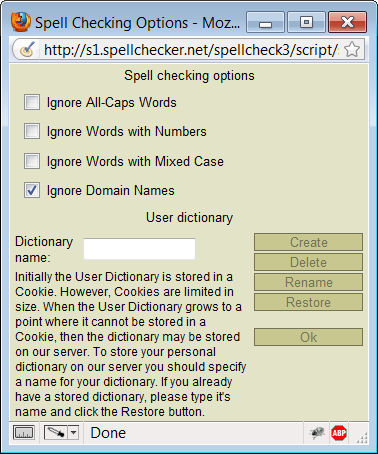
If needed, you can customize the spellchecker to your needs. To do this, press the Options button. The Spell Checking Options popup window that will open lets you configure the spellchecker settings and create or restore the user dictionary.
The following settings can be selected in the Spell Checking Options popup window:
- Ignore All-Caps Words – the spelling of words written in capital letters will not be checked.
- Ignore Words with Numbers – the spelling of words that contain numbers will not be checked.
- Ignore Words with Mixed Case – the spelling of words written with a mixture of lowercase and uppercase characters will not be checked.
- Ignore Domain Names – the spelling of website addresses will not be checked (this option is selected by default).
Below you can also create, delete, rename, and restore the user dictionary, just like you did for the Spell Check As You Type (SCAYT) feature.
When you are happy with your settings, click the OK button to return to the Spell Check dialog window. The settings will automatically be applied to the whole text.
Using the Spellchecker
Once you configure the spellchecker to suit your needs, you can move to actual spell checking.
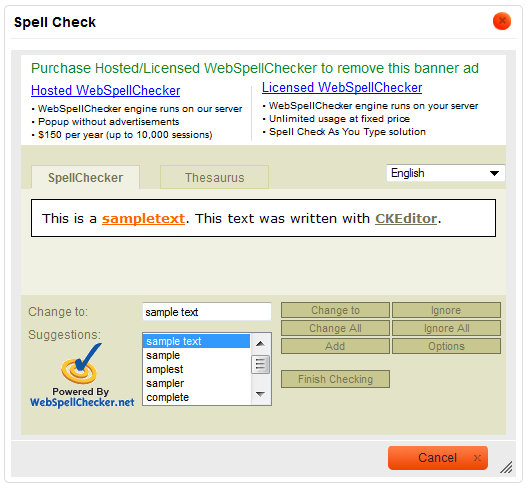
The Spell Check dialog window contains a preview of your text, with problematic phrases marked in bold and underlined. The currently active phrase that you can work on is additionally highlighted in orange. The Suggestions selection list contains the spellchecker suggestions for correcting the error; the one that suits best is also displayed in the Change to text box. To correct the text you can select one of the suggestions from the list. You can also further customize it by selecting it from the list and then manually correcting in the Change to text box.
When you are happy with the spelling replacement, click the Change to button. The spellchecker will move to the next problematic phrase.
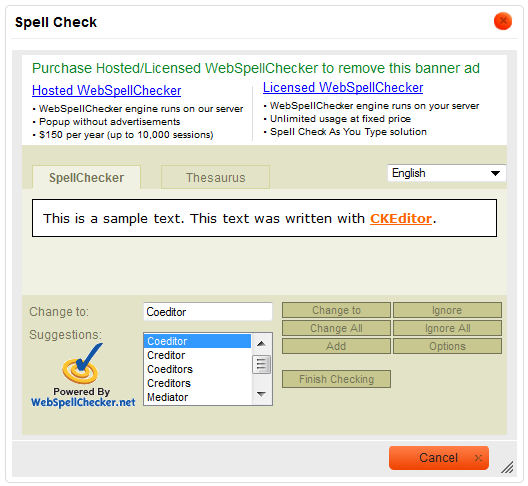
In this case this is the "the editor" name. Since it is a proper name, it cannot be found in the spellchecker's dictionary, so you have two actions to choose from. First, you can skip this item, ordering the spellchecker to ignore it by clicking the Ignore button. This occurrence of the word will no longer be highlighted and considered an error. Second, you can add the word to the user dictionary by clicking the Add button. From now on the
spellchecker will treat the phrase as valid and use it in its suggestions.
Remember that you can also batch change or ignore the errors highlighted by the spellchecker, with your choice influencing all occurrences of a particular error in a given text. To do this, use the Change All and Ignore All buttons from the Spell Check dialog window.
When there are no pending issues detected by the spellchecker, the action buttons will disappear and you can click the Finish Checking button to return to the editor editing area.
Thesaurus
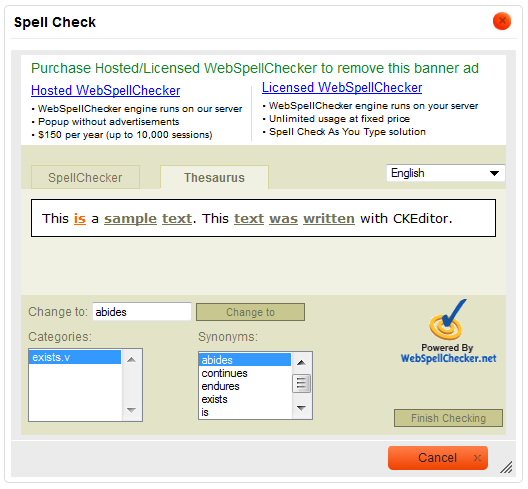
The thesaurus feature of the spellchecker allows you to avoid repetitions in your texts as well as easily find the best words to describe the meaning that you are after. To use the the thesaurus, press the  toolbar button and click the Thesaurus tab on the Spell Check dialog window
that will open.
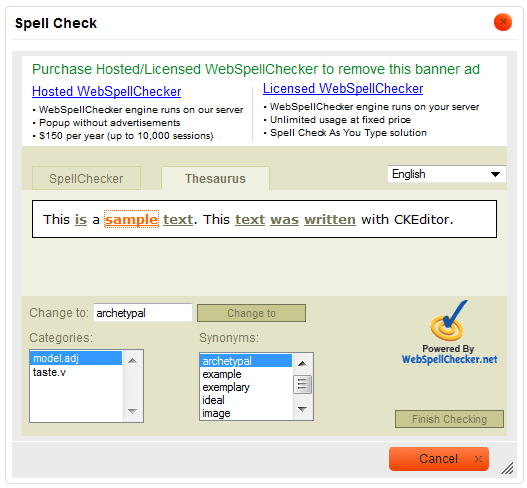
The Thesaurus tab contains a preview of your text, with phrases whose synonyms are available marked in bold and underlined. The currently active phrase that you can work on is additionally highlighted in orange. The Categories selection list divides possible synonyms according to the meaning of a word. After choosing a category you can select one of the suggestions from the Synonyms list. The currently selected suggestion is also displayed in the Change
to text box. To replace the text you can select one of the suggestions from the list. You can also further customize it, by selecting it from the list and then manually correcting in the Change to text box.
When you are happy with the spelling replacement, click the Change to button. The spellchecker will move to the next phrase that it has a suggestion for. You can also skip items and move directly to the one that you want to replace by clicking the underlined word with your mouse.
Note that not all words have their synonyms and only those that do are underlined and can be selected.
When you are ready, you can click the Finish Checking button to return to the editor editing area.
Please note that the thesaurus feature may not be available for all languages.
Please send us suggestions regarding this documentation page
If you would like to recommend improvements to this page, please leave a suggestion for the documentation team.


