Directory Items
By clicking on the "Setup" menu of the Directory module, you can access the "Items" section where you can view and create items for your site's directories.
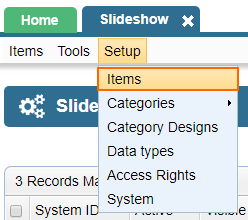
Upon clicking on the "Items" option, you will be presented with a window where you can select the directory that you would like to begin working with before proceeding to the "Items" tab. Double click on the directory name or click the Edit icon.

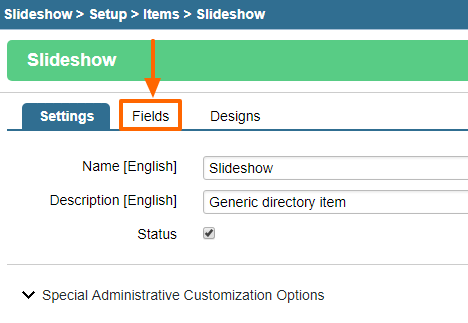
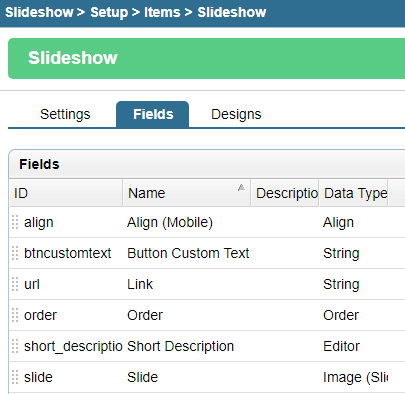
You will be shown the Settings tab by default. Do not change any settings here unless you know what you're doing. Cick on the "Fields" section to see all the fields that the directory has.
Creating Items
In order to add a new item to the selected directory, simply click on the "Add" icon in the upper right-hand corner of the "Items" table.
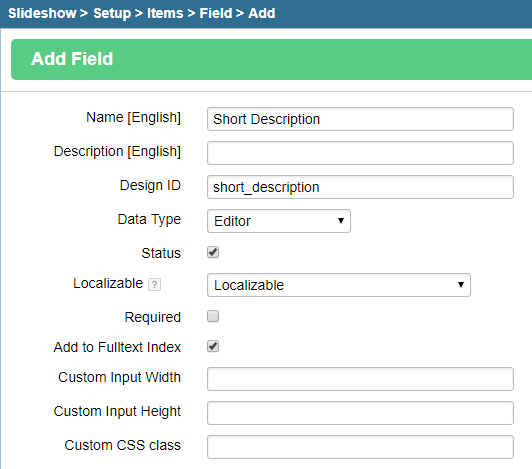
Once clicked, you will be presented with a customized "Item Form," with various fields to complete, depending on what you have specified in the directory's Setup. Here are the fields that you will see in the list.
Out of all of these, the "Name", "Design ID", and "Data Type" are the minimum required to create the item in order for it to show up in the admin.
- Name
- Description
- Design ID - please give an id to this item; this should be lower case with no space
- Data Type - choose one of the data types from the dropdown. These can be edited through the datatypes section if you require a new datatype. See more on datatypes here.
- Status - check this option to make this option active
- Localizable - something that will be expected to be translated, should be marked as localizable on a multi-lingual website.
- Required - check this option to make the field required
- Add to Fulltext Index - this option makes the field's data available to the search so it can show up in the search results when someone searches for a term that is mentioned in this field - any content-based field should have this checked so it can appear in search.
- Custom Input Width - leave blank unless you'd like to specify a width
- Custom Input Height - leave blank unless you'd like to specify a height
- Custom CSS class - for advanced users; leave blank if you don't have any custom CSS class to add here
Click "Save" at the bottom of the screen, and the field will be added to the list of fields for the item in the directory.
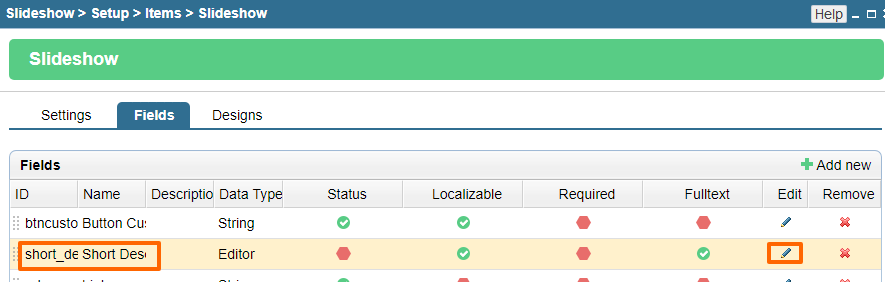
Editing Fields
In order to edit an item, simply click on the "Edit" icon or double click the row that the field is in
You will then be presented with a form containing various sections, depending on what you have specified in the directory's Setup.
Once you are done, simply click "Save" at the bottom of the window, and your changes will be applied.
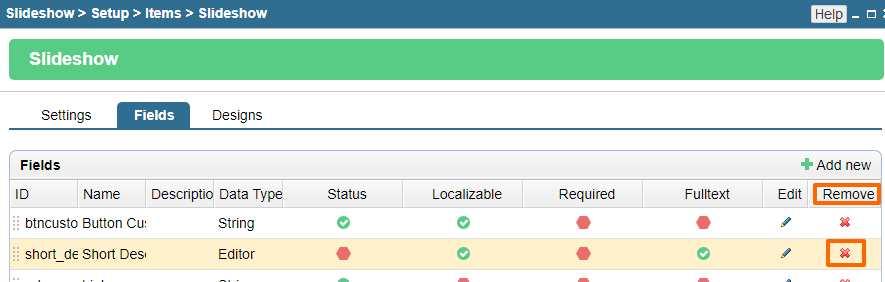
Deleting Items
In order to delete a field, simply click on the "Delete" icon in its row of the "Items" results table.
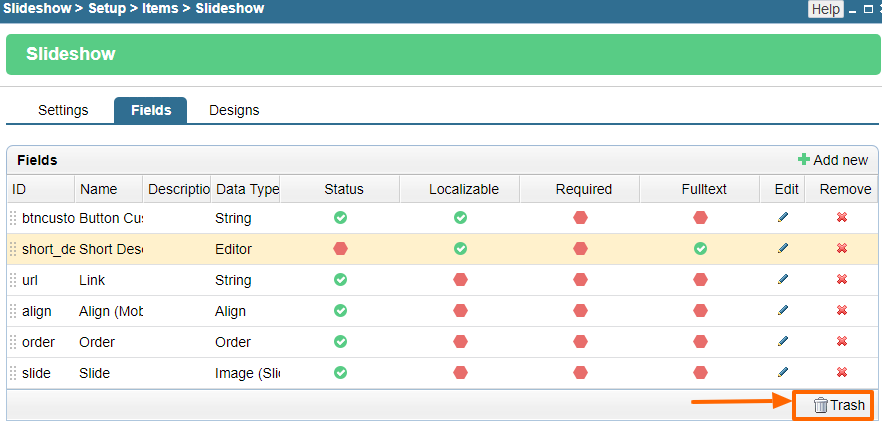
Trash
Note that all deleted items end up in the Trash and require further deletion to be completely removed from the system. It's a good idea to delete a field from the "Trash" at the same time as deleting it from the list of fields so the id can be used on a new field you may want to create in the future.
Please send us suggestions regarding this documentation page
If you would like to recommend improvements to this page, please leave a suggestion for the documentation team.