CRM Tables
The Tables section of the CRM Setup tab allows you to control and modify all of the different tables that appear within the CRM system, and the fields and options that they contain.
By clicking on the desired system table name within the list, you will be able to view and/or modify the specific options that are available to users when accessing that particular table in the CRM system.
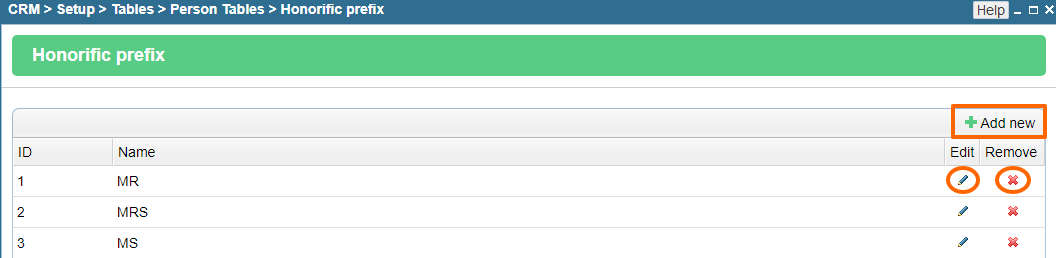
Simply use the provided icons to add, remove, or edit the options currently listed under each field within the table.
Click on the green "Add" icon in order to add new options to a particular field, the red "Delete" icon in order to remove the particular option it is located next to, and the "Edit" icon in order to modify a particular option.
Here's an example of what you can expect the layout to look like:
Person Tables
The Person Tables section deals with the options that may be relvant for a contact's personal details such their name prefix, hair color, eye color, interests and profession.

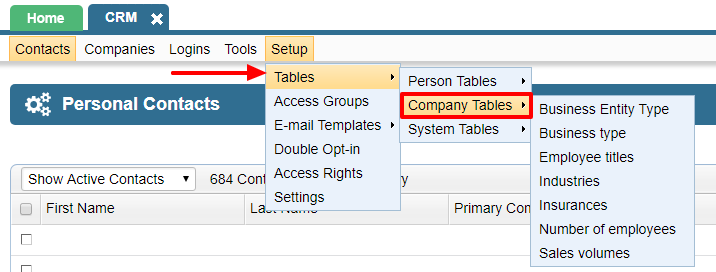
Company Tables
The Company Tables section deals with the options that are relevant for a company such as business type, employee titles, number of employees, etc.
System Tables
It's necessary to understand the various features that exist under System Tables, so you can make use of many handy features that you can utilize on your website.

1. Contact Types: Contact types are useful in segregating your contacts into various groups. If you have an ecommerce website, your customers that buy online are automatically added to the "Ecommerce customer" contact type. You can use the segregation in your search for users who have ever bought anything from you for exmaple. Contact Types can be further customized into forms, products, datatypes, etc...based on your requirements, so speak to your representative if you have a special need on your website related to contact types.
2. Countries: The countries list allows you edit, add, or remove a country from the list of countries that may display on your website - for example forms. This comes in handy for any special requirements such as renaming a country due to sensitivities of your customers, e.g. not showing Taiwan on Chinese websites.
3. Customer Source: This is useful to put a note about the source of your contacts in CRM. For instance, you may have run an offline ad which resulted in many people registering on a particular website. Those contacts can be imported with a note in the source column mentioning the ad campaign.
4. Generic access types: Not used.
5. Mailing groups: These groups help you segregate your contacts so they can be easily exported to the Mailing module where you can create specific mailings for each type of mailing group. For example, if you cater to mutliple industries, you can have multiple mailing groups for each industry so you know the interests of each contact.
6. Phone types: Allows you to add different types of phone fields to a contact's details.
7. States: This option allows you to edit, remove, or add a new state to the list of states that are show in the admin and website.
Please send us suggestions regarding this documentation page
If you would like to recommend improvements to this page, please leave a suggestion for the documentation team.