Tables
In this section, we will cover how to create and manipulate tables with the WYSIWYG editor, which can be useful in organizing information and achieving specific layouts for images and text.
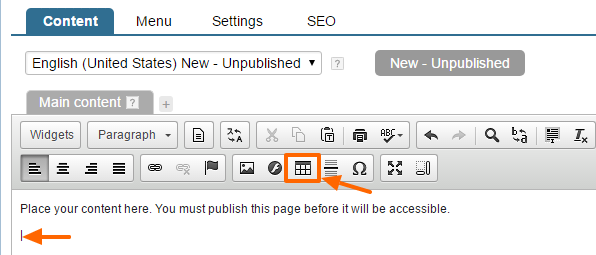
To start, open the page you wish to edit with the WYSIWYG editor. Once the page opens, place your cursor in the location where you wish to situate the table.
Click on the "Insert/Edit Table" icon .
After clicking on the icon, you will be presented with the "Table Properties" window. Here, you can specify all of the properties for the table you wish to create.
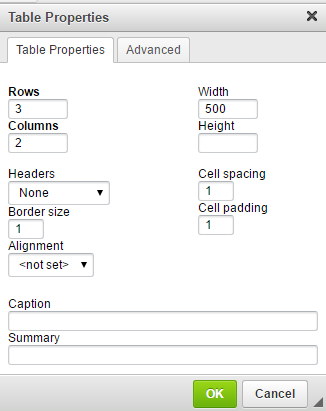
You can:
Choose the number of columns and rows
Determine border size (Specify border size="0" if you do not want any borders to be displayed)
Specify the width and height (Although, in order to get better placement of the objects inside of the table cells, it is best not to specify both of these settings)
Specify cell spacing and cell padding (We recommend using Cell Spacing="0" and Cell Padding="5")
Once you have specified the settings for your table, click on the "OK" button.
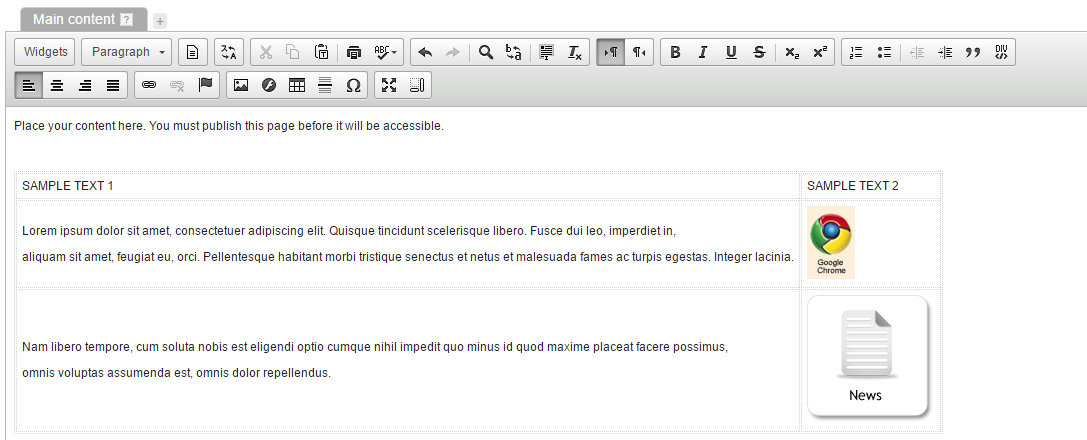
Once the table has been created and added to your page, type your text into the desired cell(s) of the table.
You can select the text you wish to place inside of the table cells and copy/paste it, or you can simply select the text and then drag and drop it into the table cell
In addition to text, you can also insert images into the table cells. Simply click on the cell you wish to place the image in, and insert the desired picture by clicking on the "Insert/Edit Image" icon.
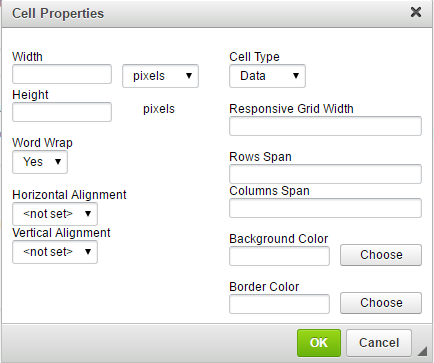
In order to alter the placement of the objects inside of the table cells, simply right-click on the desired cell, and select "Cell Properties" from the resultant menu.
A "Cell Properties" window will appear. Here, you can set and/or alter the specific cell's properties, to ensure that they are appropriate for the content included in the cell.
In addition to altering cells' properties, you can also merge and split cells, as well as add and delete rows and columns, by simply right-clicking on the desired cell and selecting the appropriate option from the resultant menu.
IMPORTANT: For any responsive design, you must add "nowrap" as a class via the advanced tab of table properties:

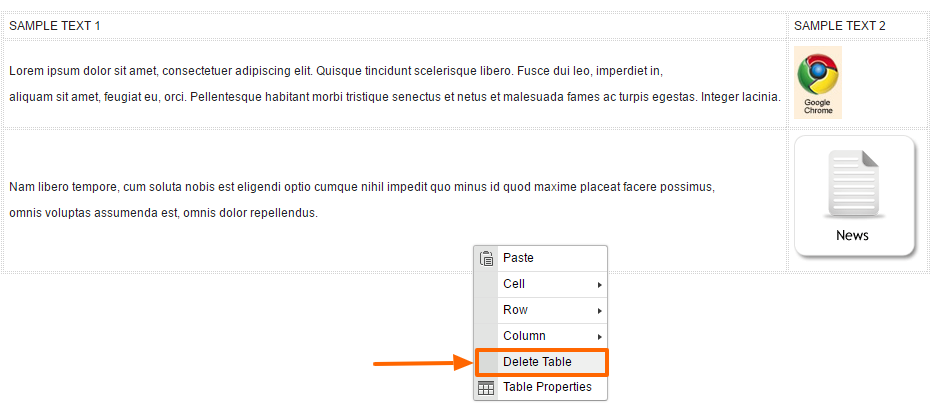
If, in the end, you wish to delete the table you have created, simply right click on the table and, from the resultant menu, select "Delete Table."
Please send us suggestions regarding this documentation page
If you would like to recommend improvements to this page, please leave a suggestion for the documentation team.