How to add an image
In this section, you will learn the basics behind adding and editing images with the WYSIWYG editor, so that you will be able to create a more dynamic site and can advance to creating pages with more complex and impressive layouts and arrangements.
Upload Your Image to the Server
Go to the File Manager module.
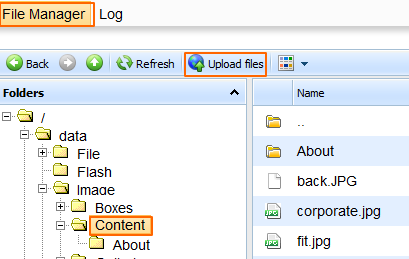
Select the folder you wish to upload your image to. Make sure to keep the folders and sub-folders nicely organized so you are able to quickly find your images later.
Once you are done adding your images, go back to the dashboard and open the CMS module:
Adding an Image to a CMS Page
To start, open the document you wish to edit with the WYSIWYG editor. Once the page opens, place your cursor in the place where you wish to situate the image.
Click on the "Insert/Edit Image" icon.

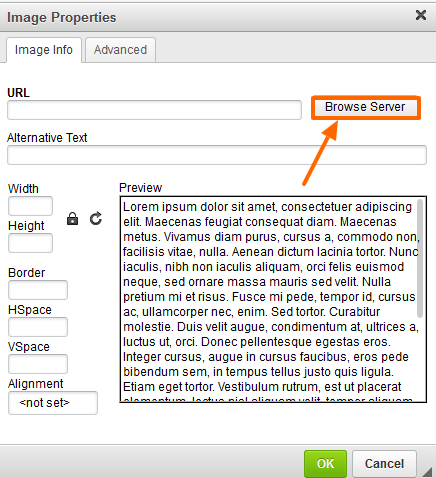
After clicking on the "Insert/Edit Image" icon, you will be presented with the "Image Properties" window (as shown below), where you can proceed to choose the desired image to be placed on your page.
Click on the "Browse" button and look through the files uploaded in your File Manager module.
If the image is not there, upload the image to a folder in the File Manager.
Once you have found your desired picture, select it and click on the "Open" button. You will then return to the server browsing window.
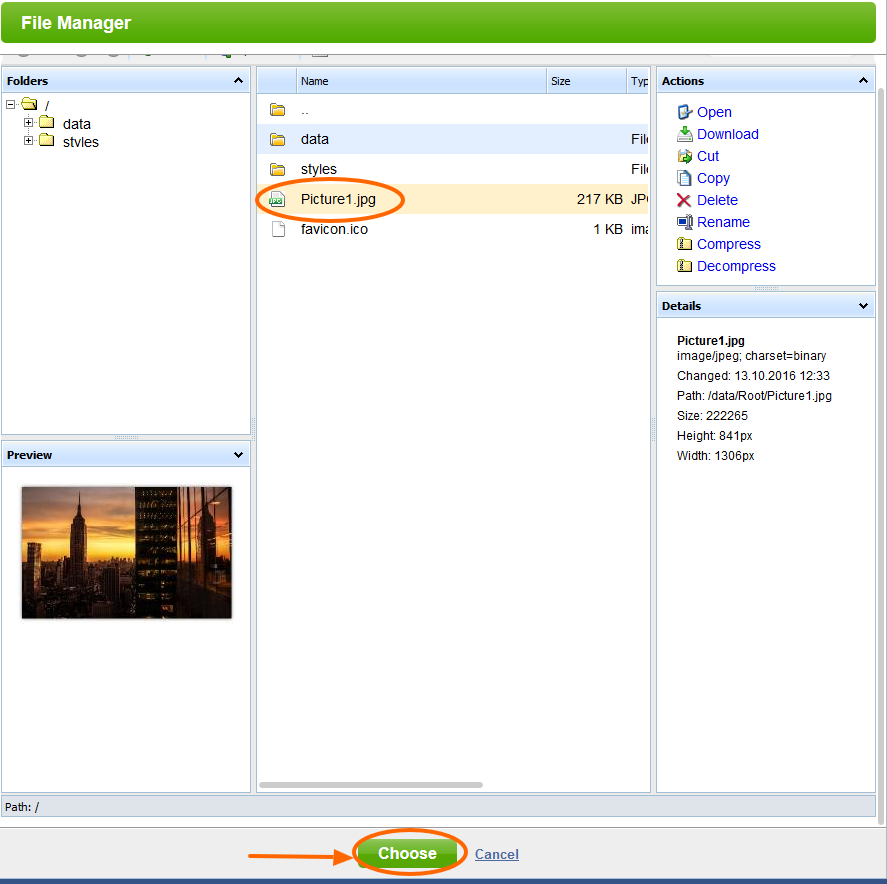
Make sure that the picture displayed is in fact the picture that you wish to upload to your page. If so, click on the "OK" button in order to add the picture to the actual page.
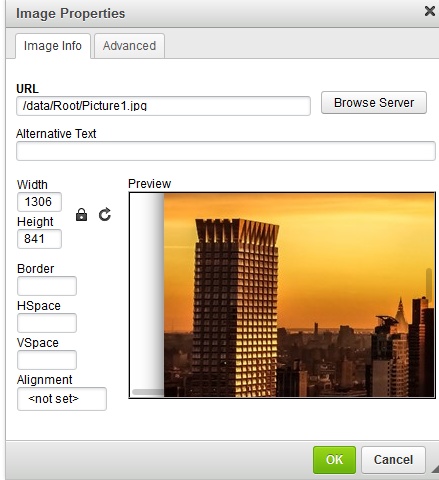
The image should now appear in its rightful position on the page, as viewed in the WYSIWYG editor.
Editing an Image:
Once an image has been uploaded to your page, you can return to the "Image Properties" window at any time in order to edit the image.
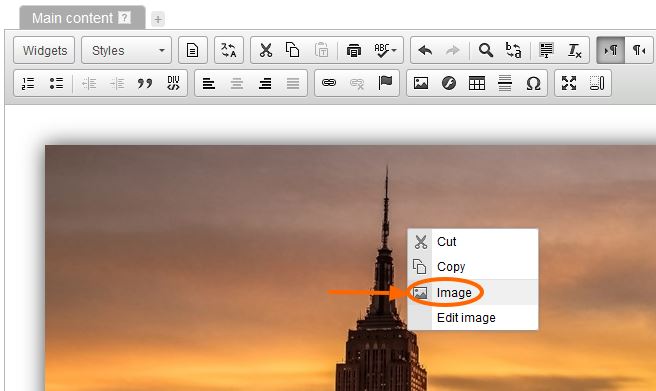
In order to do this, simply click on the desired image within the WYSIWYG editor, and click on the "Insert/Edit Image" icon or right mouse click on the image and choose "Image".
You will then be presented with the same "Image Properties" window used in adding the image to the page.
Here, you can modify various properties and settings of the image, such as its width, height, and alignment, as well as perform more serious alterations such as replacing the image with an entirely different file or turning the image into a link to another page.
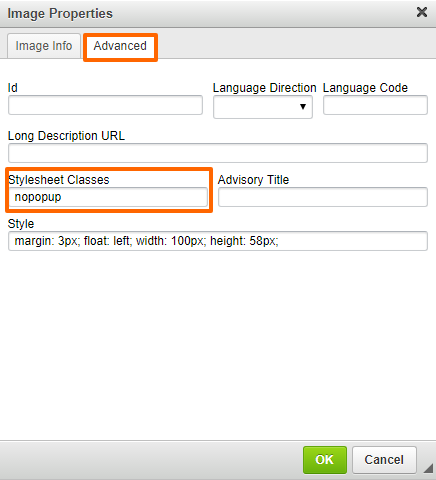
Make Images Unclickable
Whenever an image is resized to something that is not the original size, we automatically link it to a popup with the original size version.
There is an easy way to resize it and not get a popup - just add the class "nopopup" to the image via the Image's Advanced tab. Please see below:
Please send us suggestions regarding this documentation page
If you would like to recommend improvements to this page, please leave a suggestion for the documentation team.